LightKit Pro — Find your light before the shoot Skip to content
Free beta · Windows & Mac

Find your light before the shoot.

Place lights, modifiers and a camera in a virtual studio, shape each light, and see the photograph it makes. Arrive on set with a plan instead of a guess.

Join the free beta

Windows & Mac · Lighting is estimated for planning

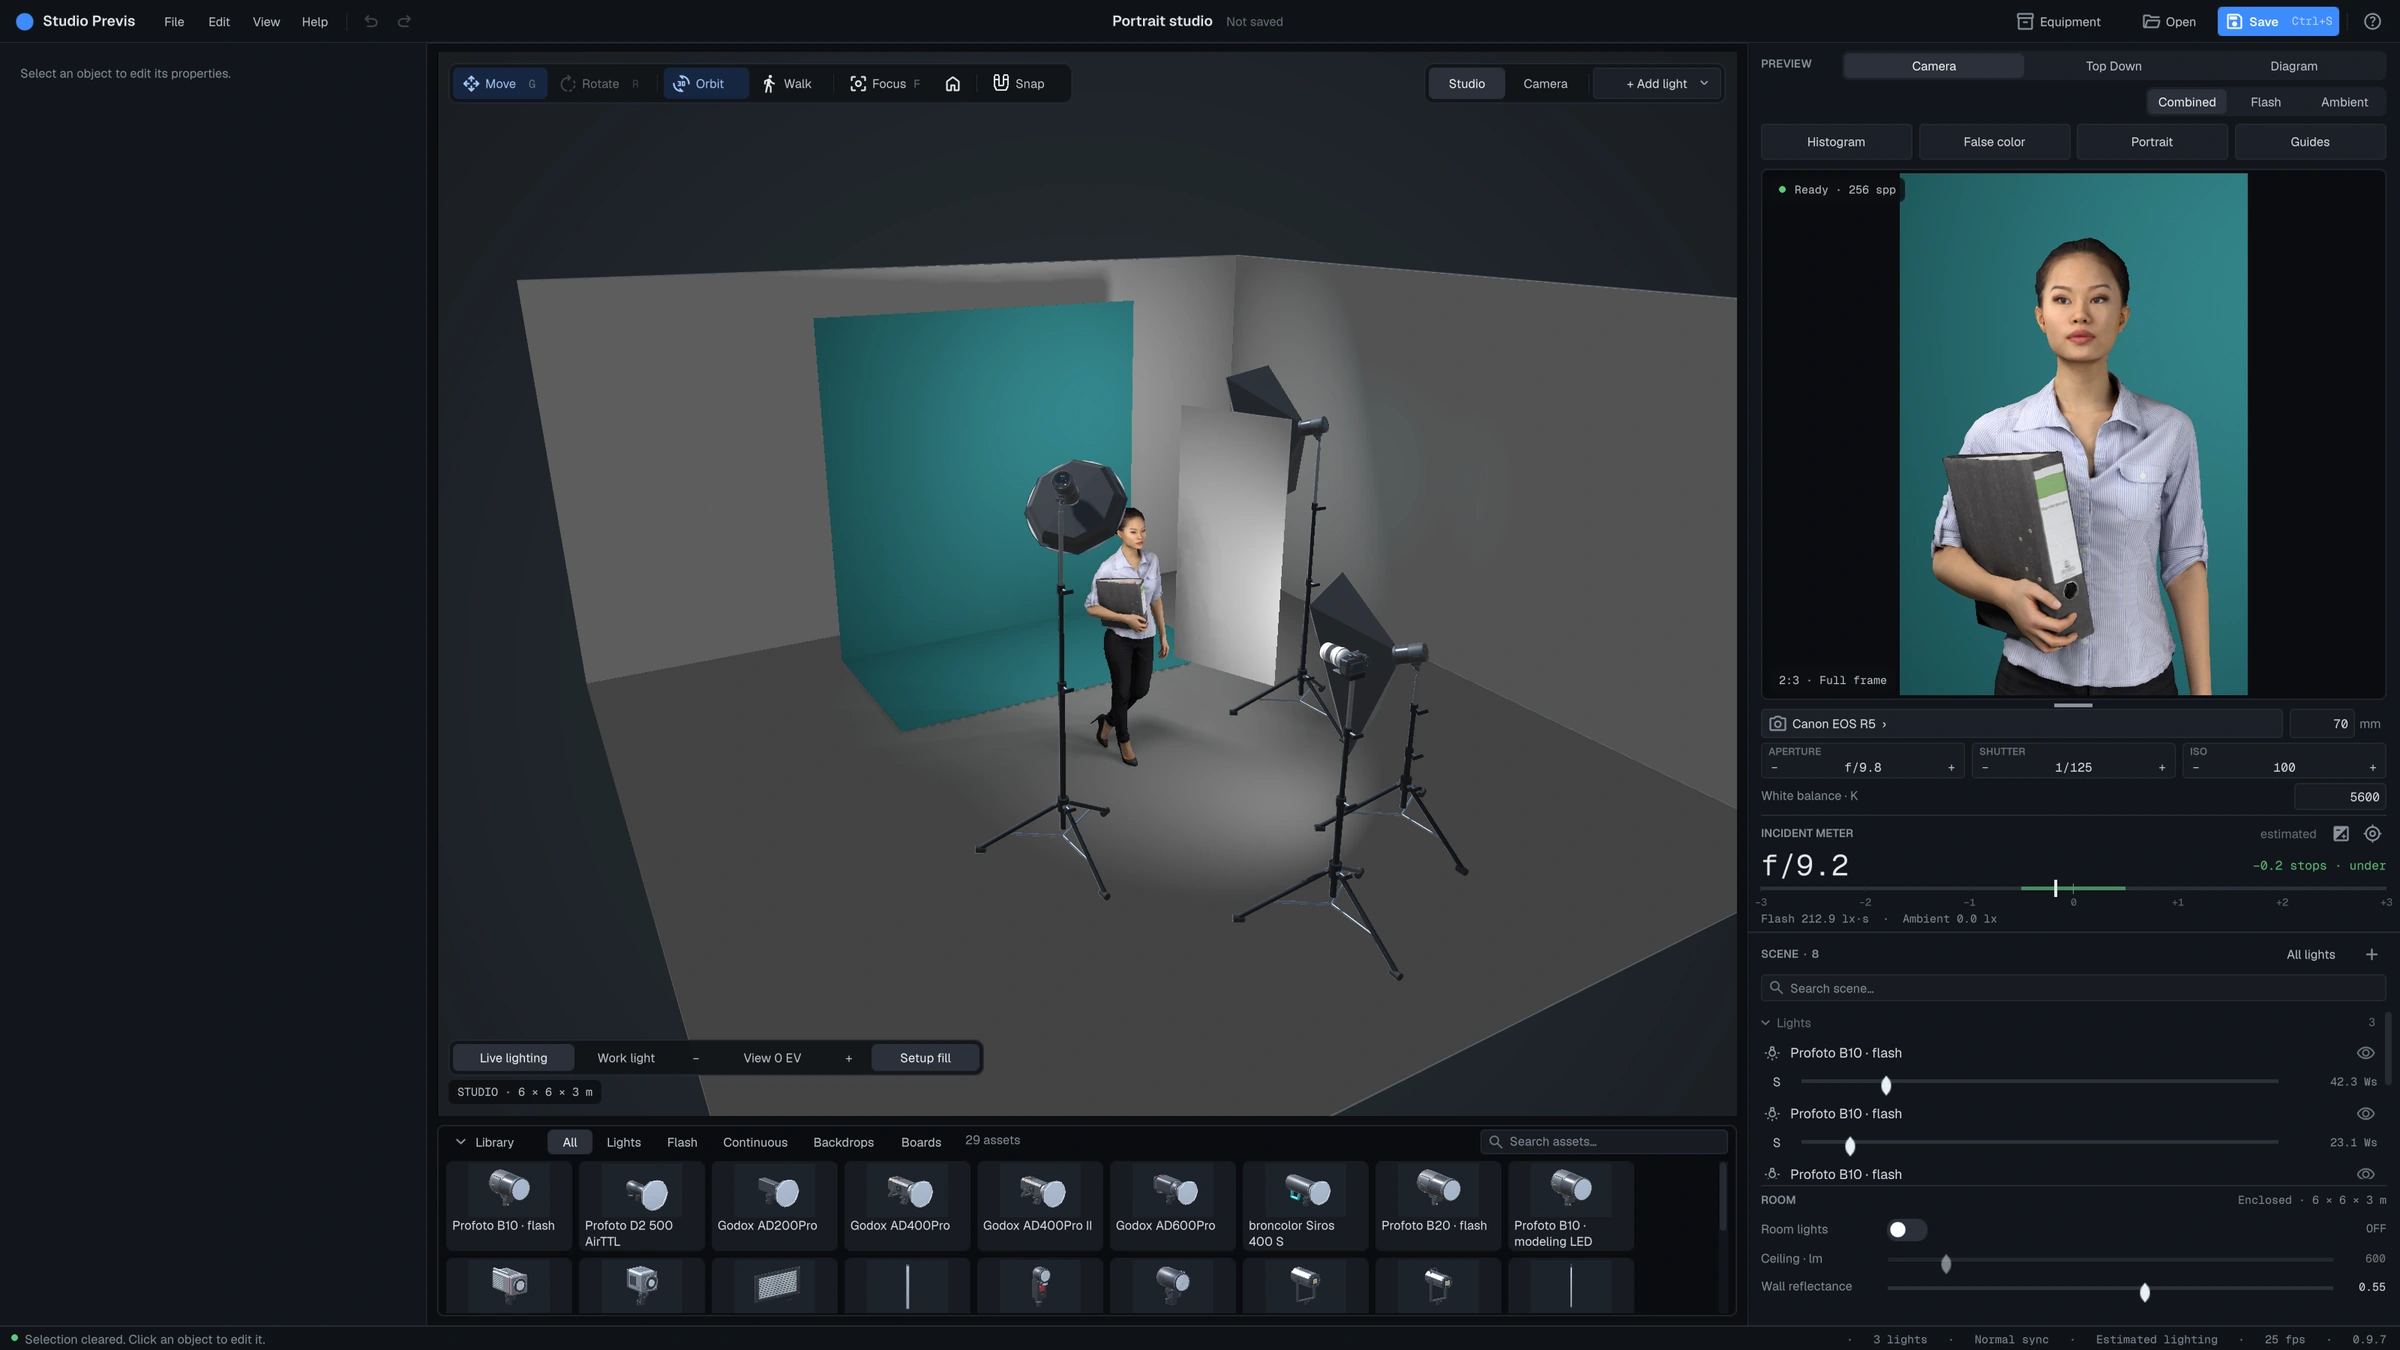
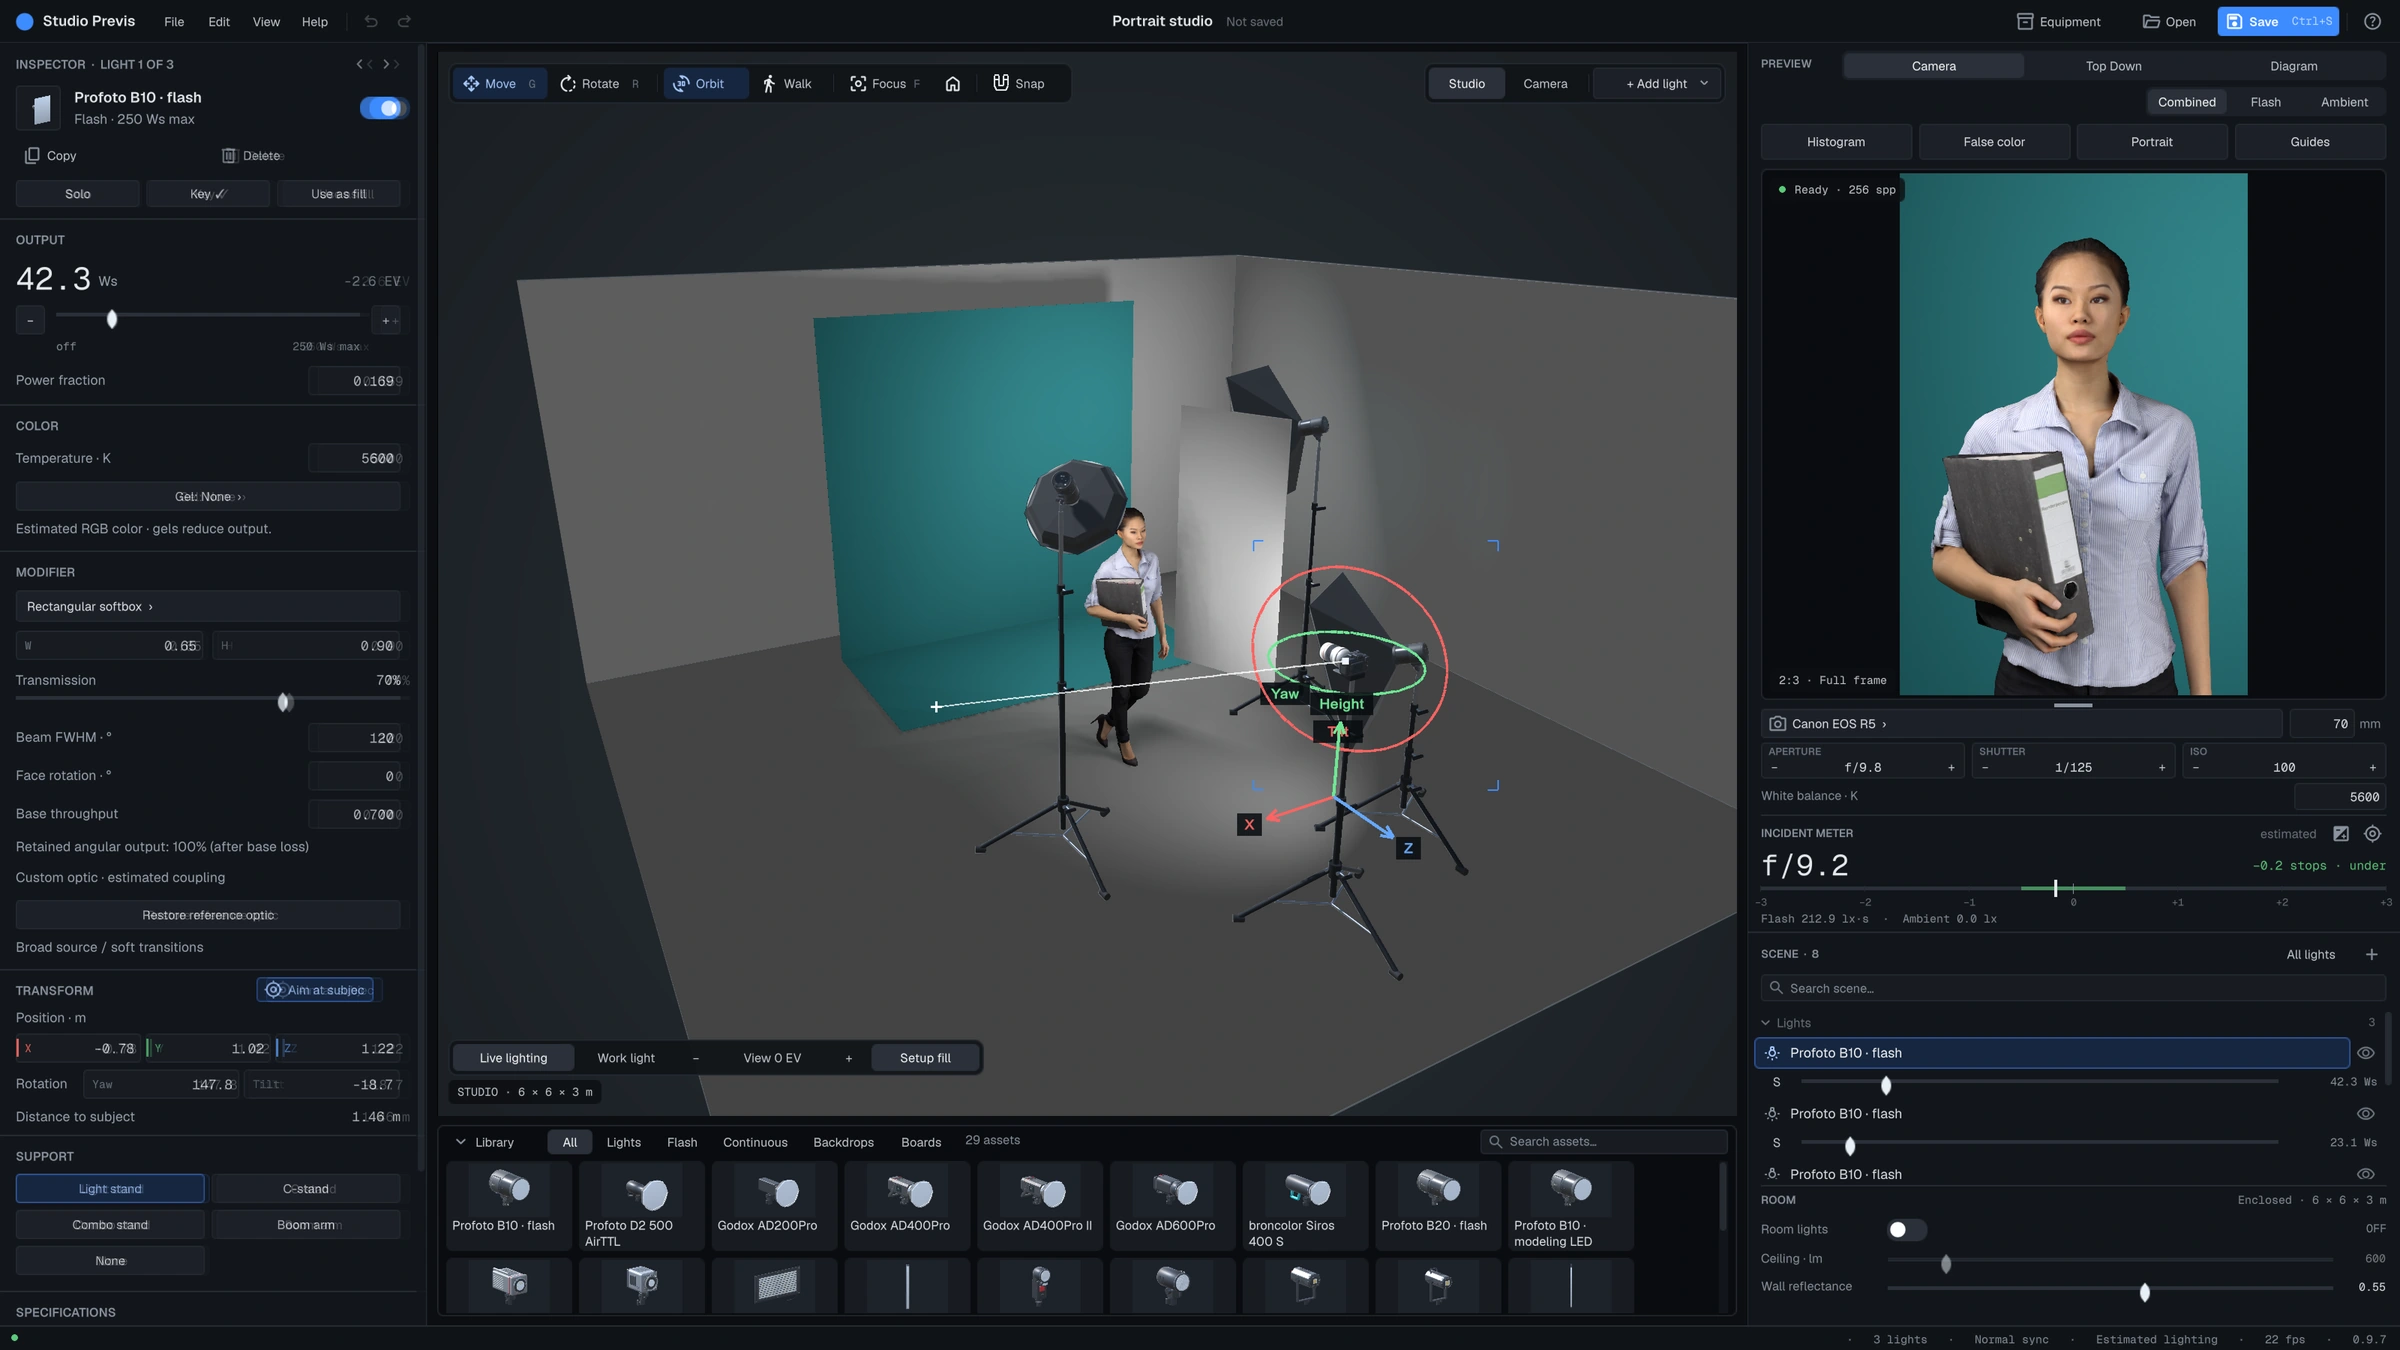
The LightKit Pro workspace: live studio with three lights, equipment library below, camera preview, meter and scene list on the right

Swipe to explore · Enlarge for full size

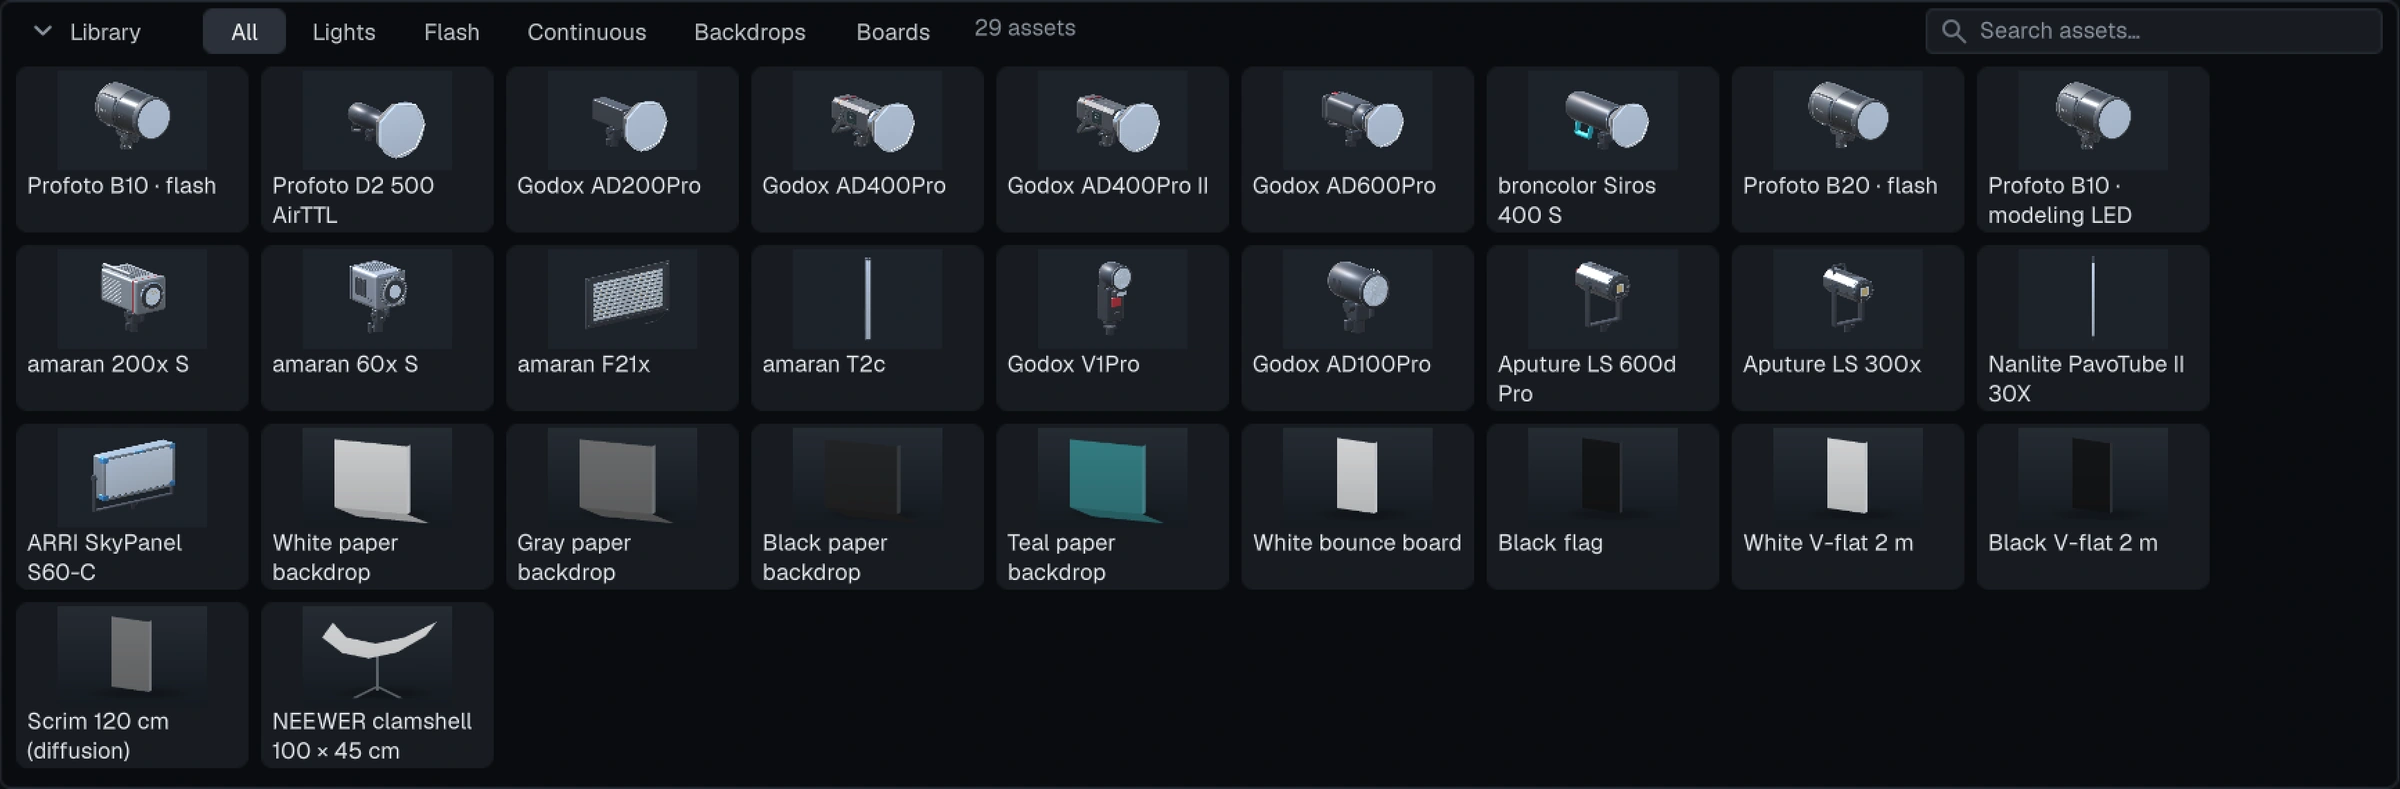
  • 01Equipment library
  • 02Live studio lighting
  • 03Photographic preview
  • 04Selected-light properties

Workflow

Three steps from empty studio to finished frame.

The same order you'd work in a real studio — without carrying a single stand.

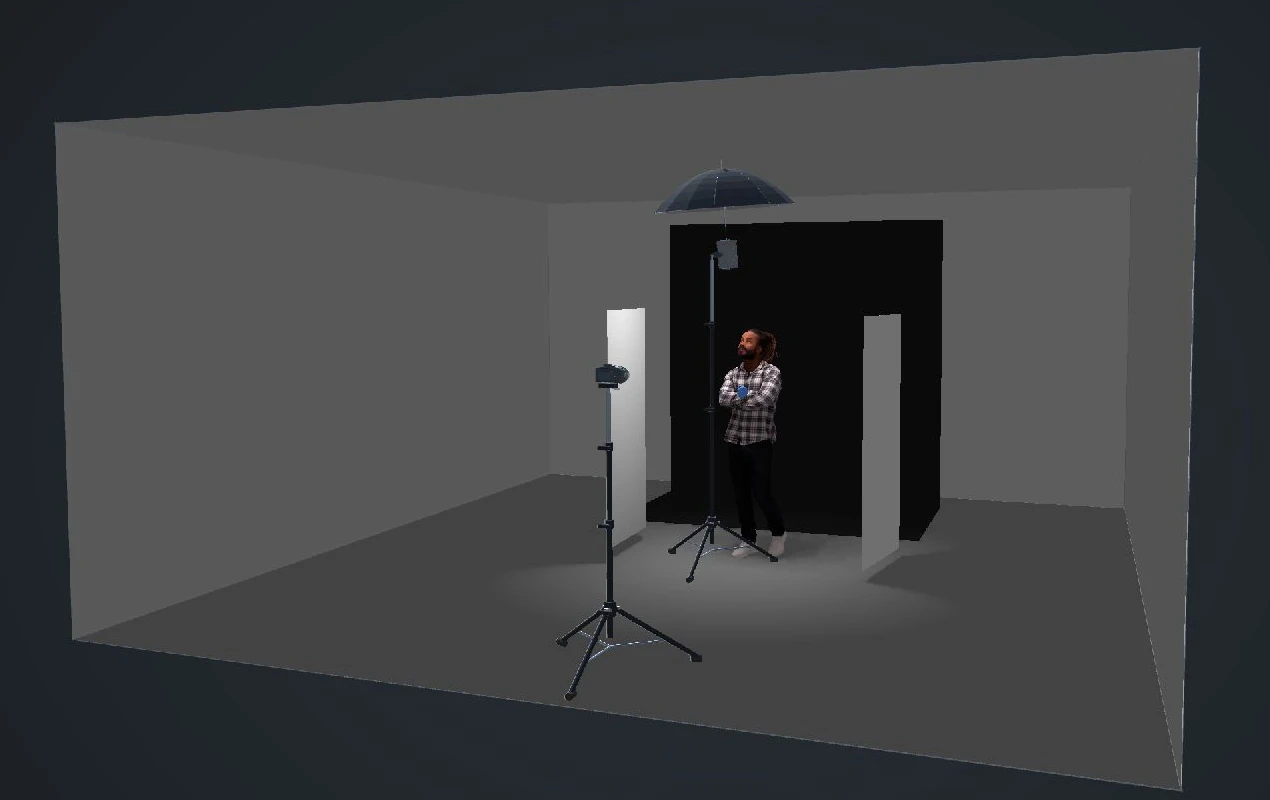
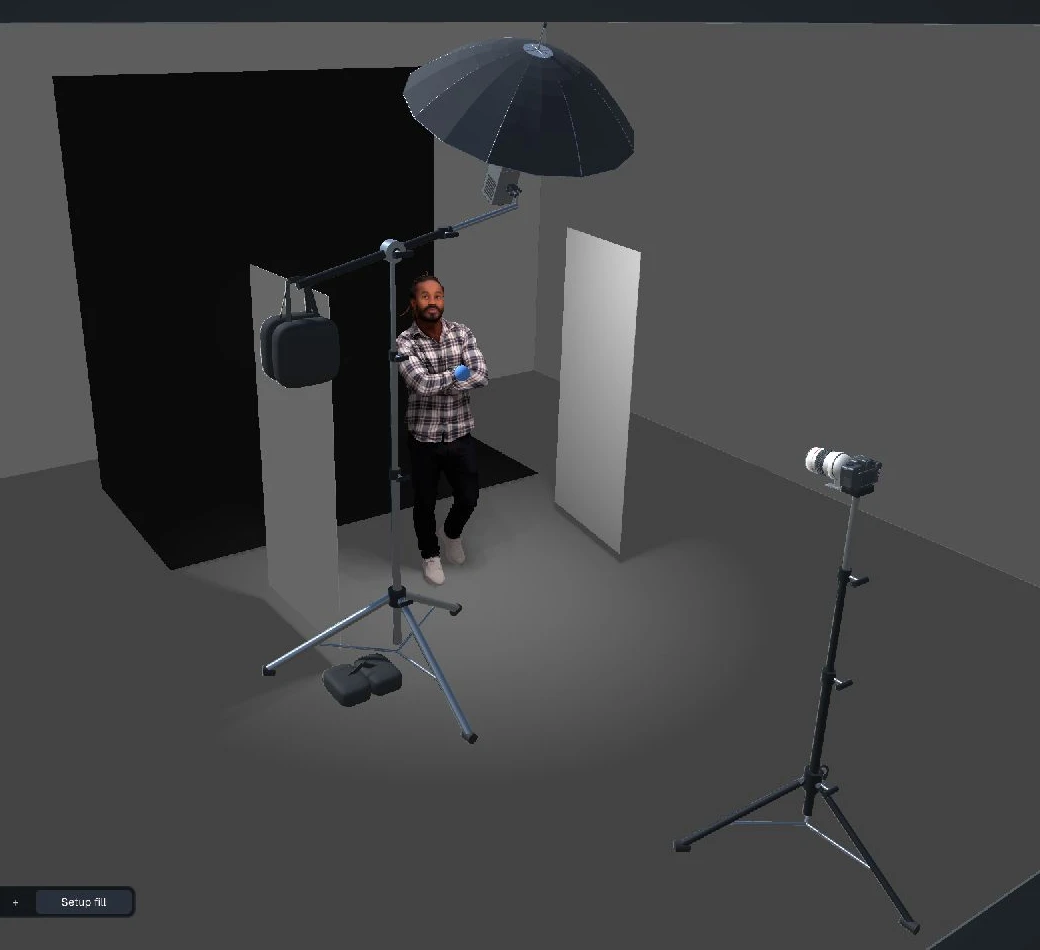
  1. A one-light setup being arranged: umbrella on a boom arm with sandbags, two white boards, black backdrop and camera on a stand
    01

    Arrange your equipment.

    Drag lights, modifiers, stands and a camera from the library into the studio. Move, raise, yaw and tilt each piece with handles right on the set.

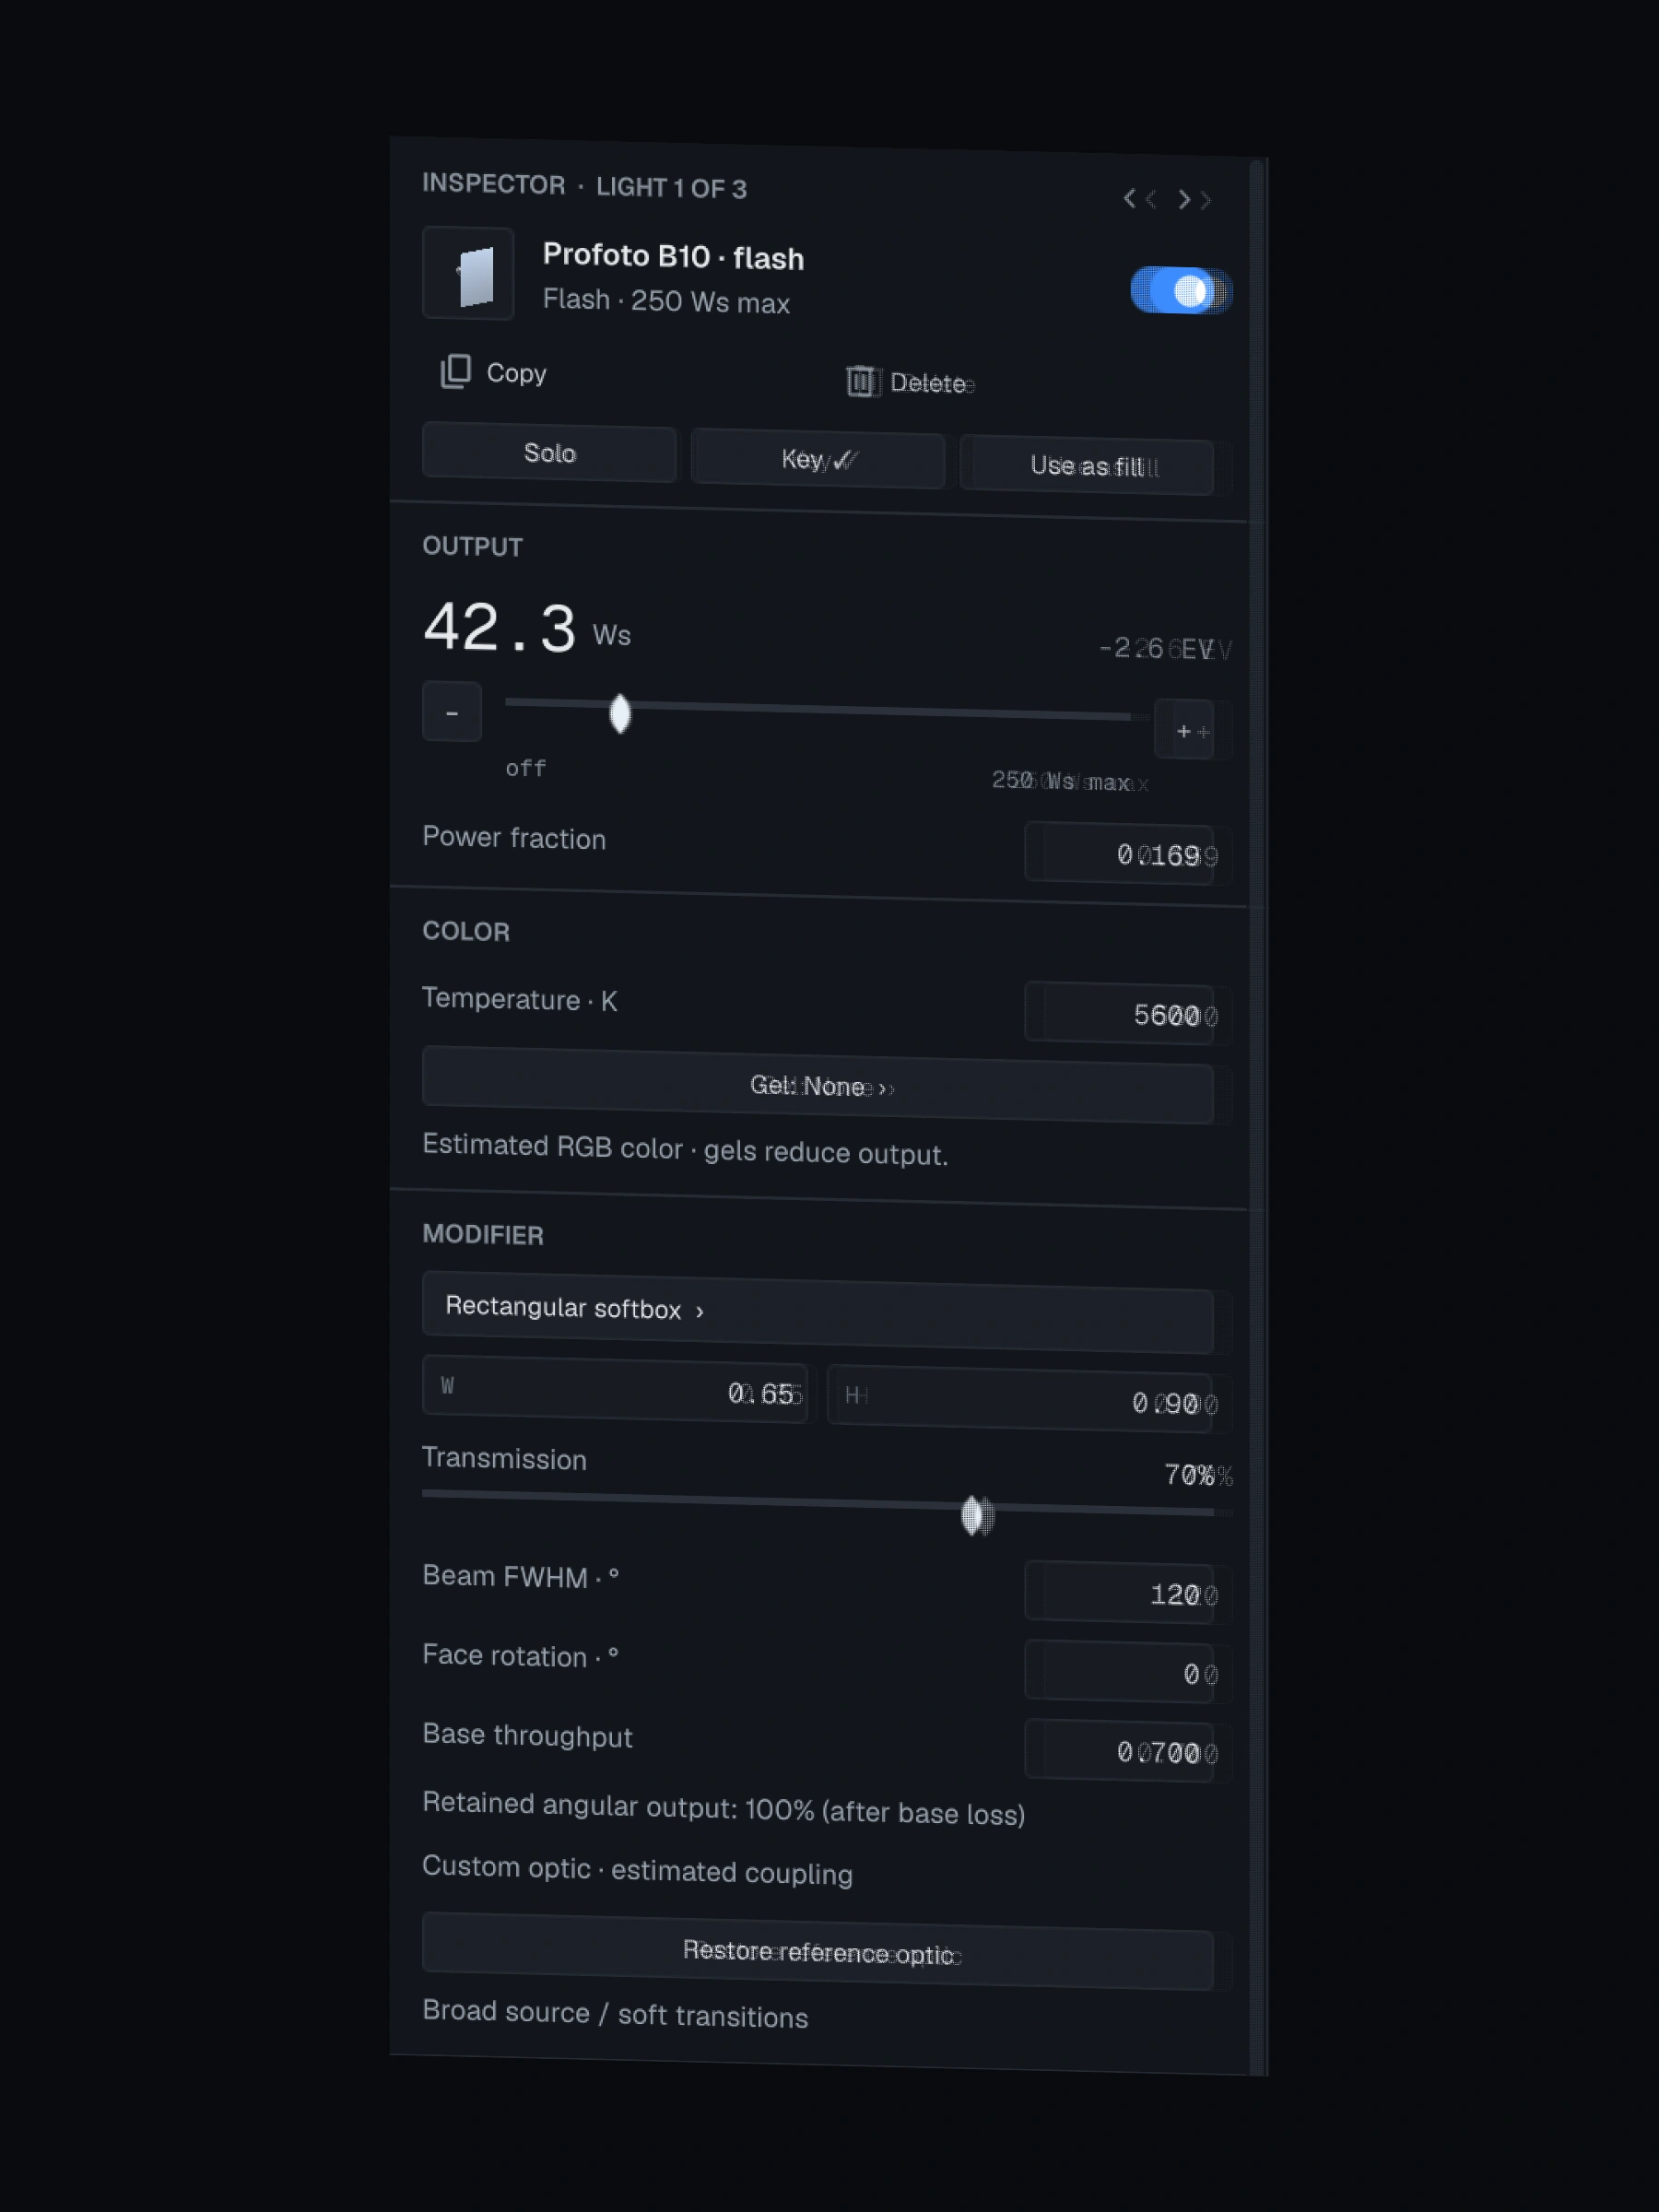
  2. Selected-light inspector: output in watt-seconds, color temperature, gel, modifier and transmission
    02

    Shape the light.

    Set power and color temperature for each light, and use RGB where the light supports it. Solo a light to see exactly what it adds, then compare key and fill.

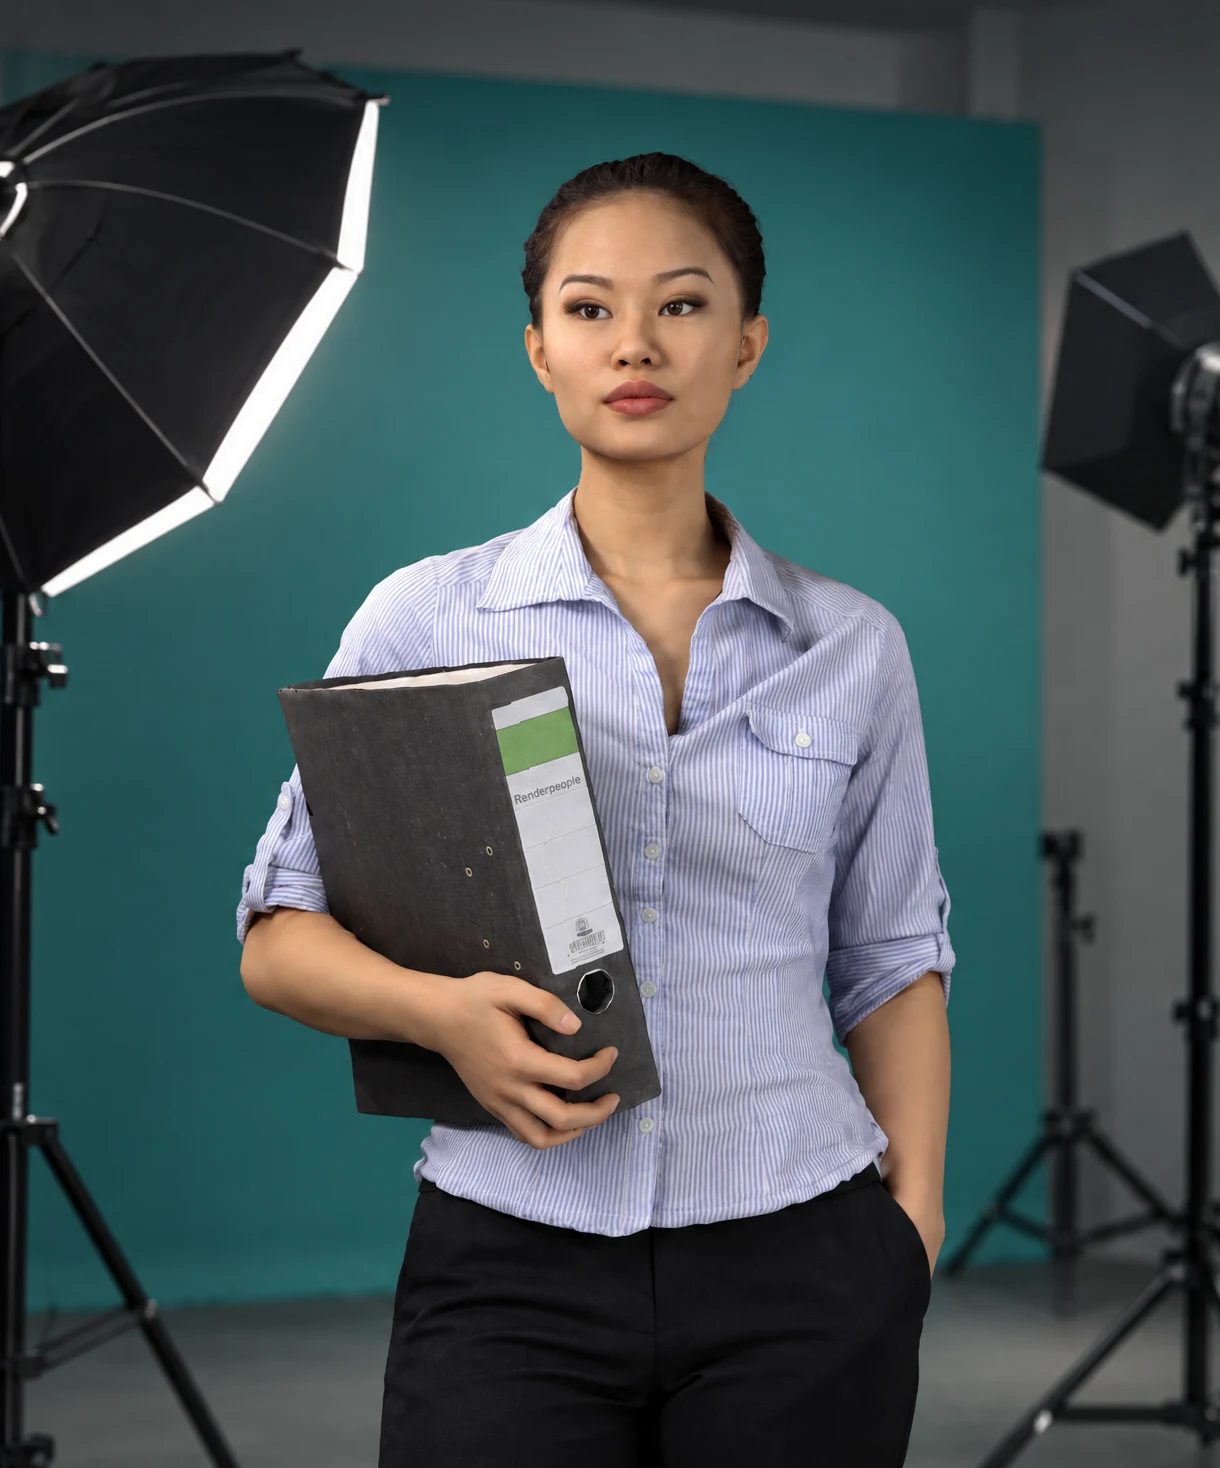
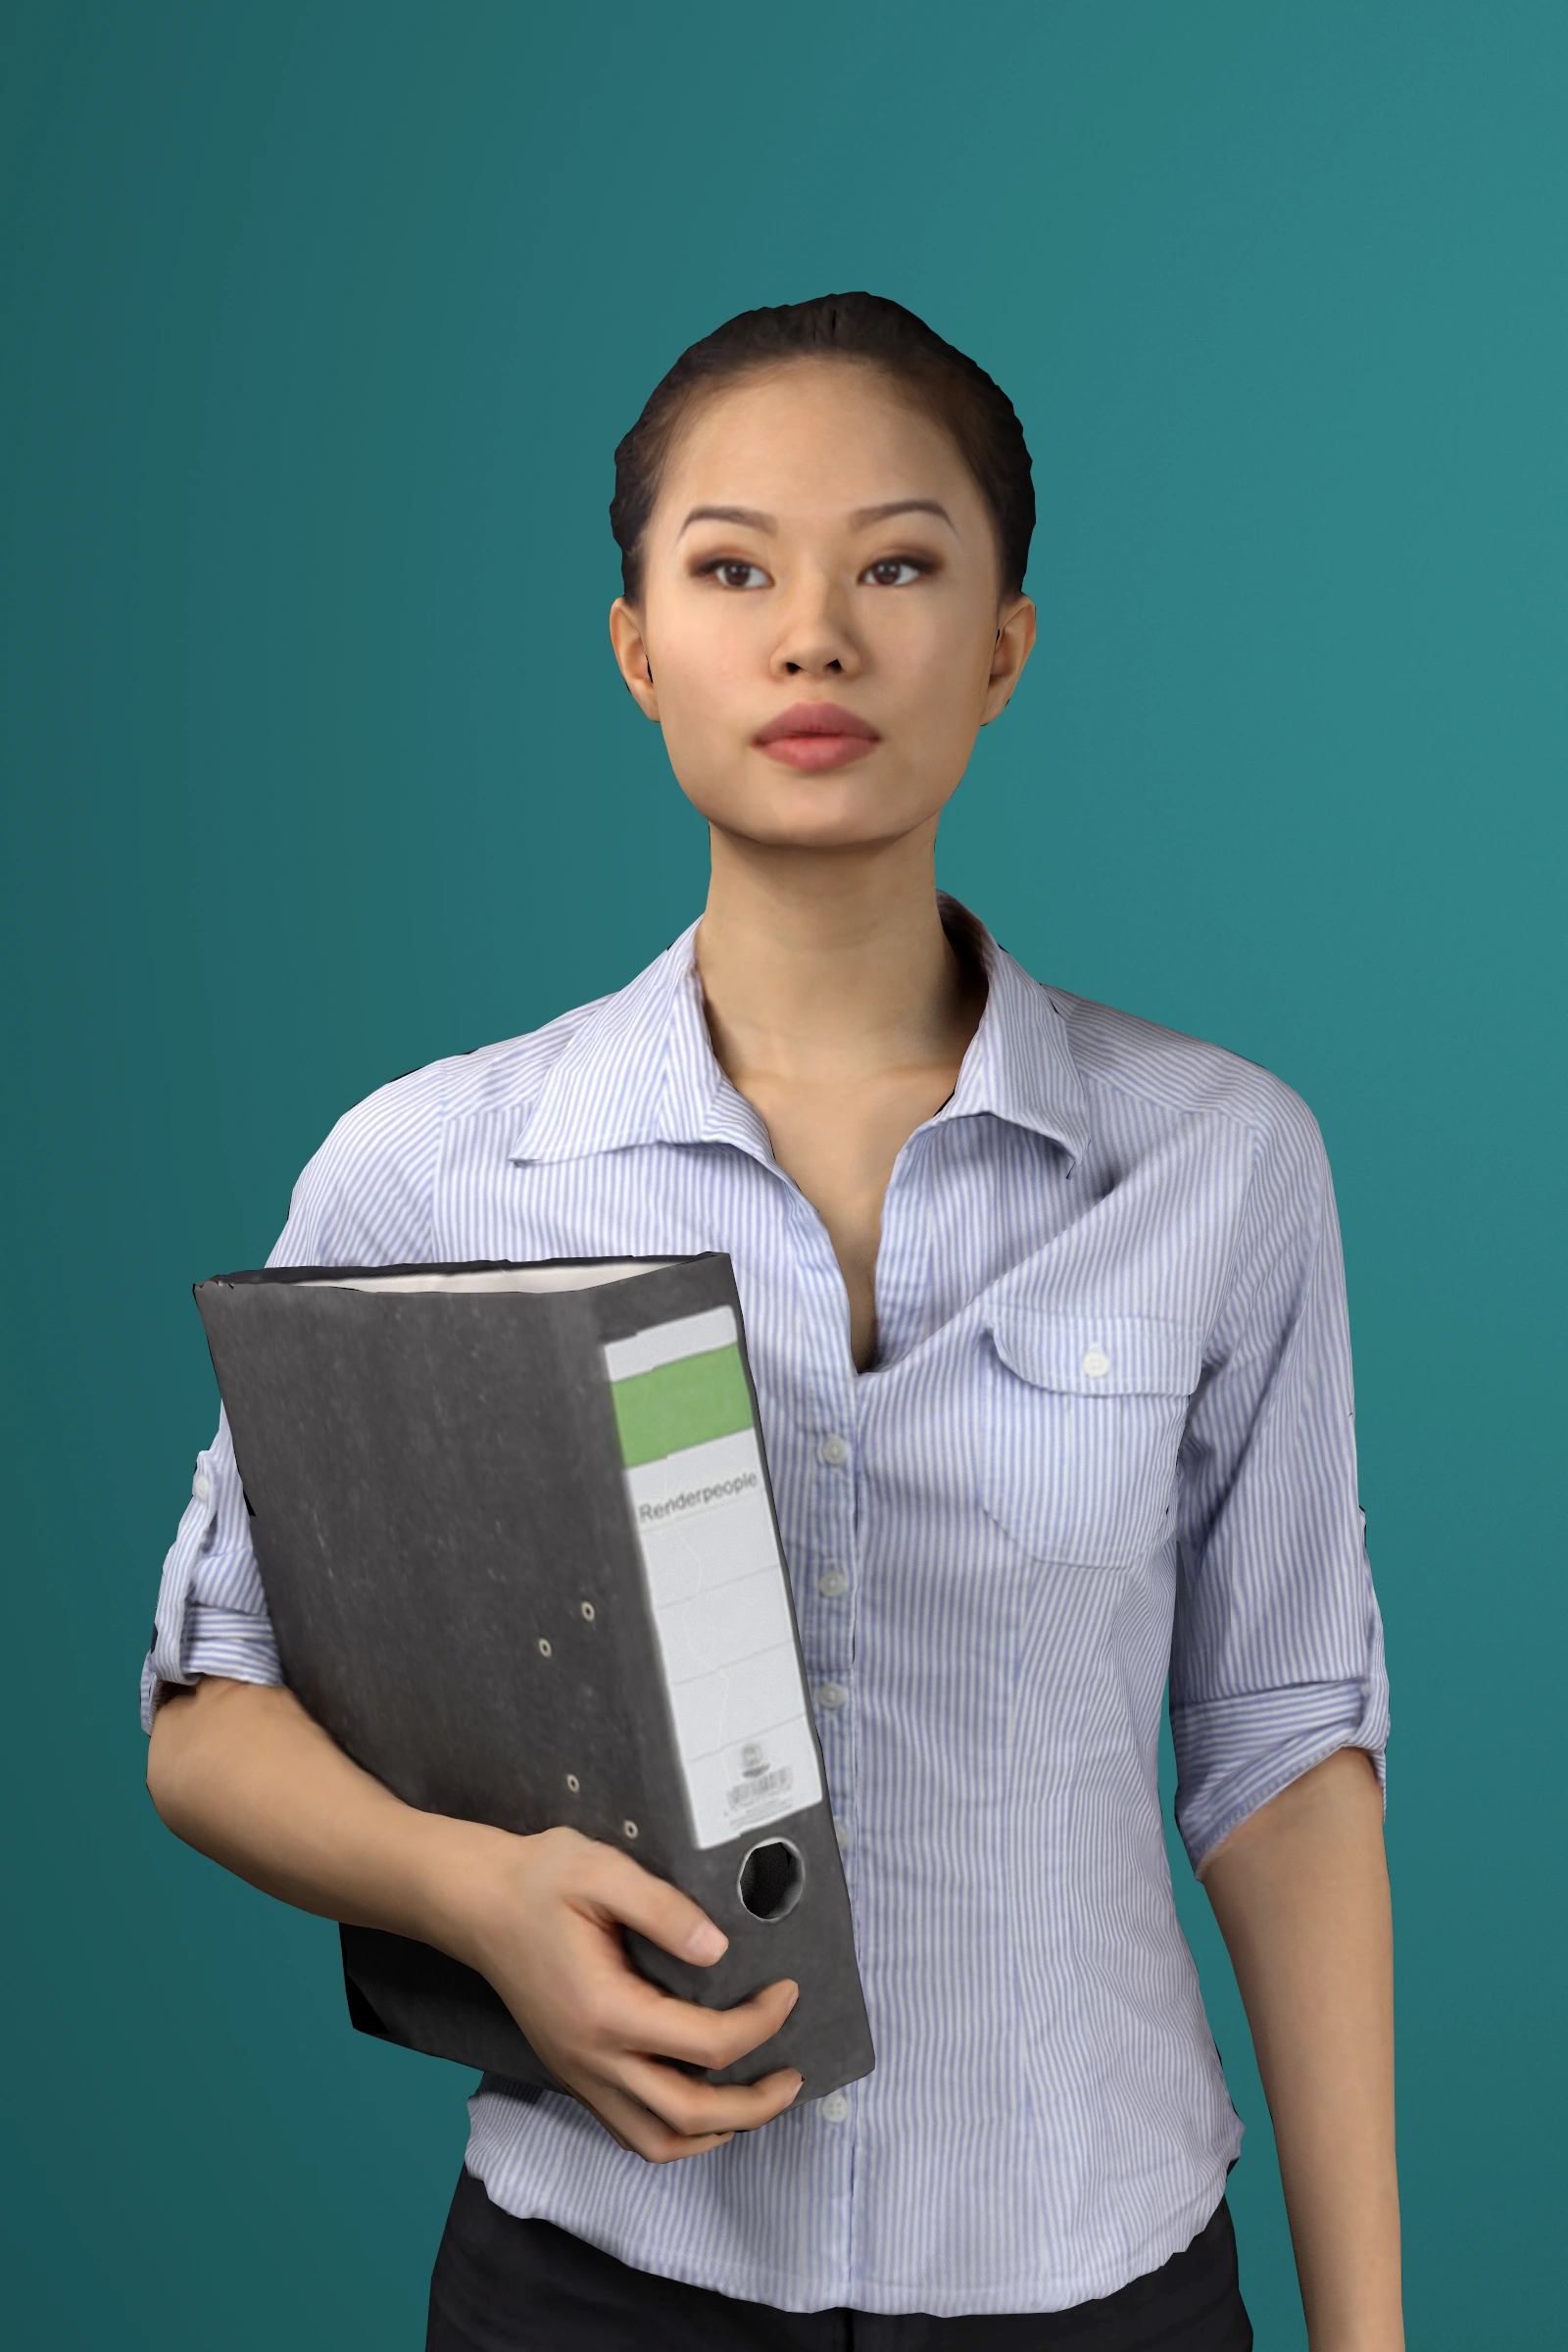
  3. The rendered photograph: a portrait against a teal backdrop
    03

    Preview and save your photograph.

    Set exposure, white balance, focus and depth of field, and see the result beside the studio. Save the scene, keep snapshots, and export the photograph as a PNG.

Product

The real workspace, up close.

The light you've selected, always within reach.

Click a light in the studio and its properties open beside it. No hunting through menus while you're mid-thought.

Power
Per-light output
Solo
See one light on its own
Kelvin
Color temperature
RGB
On lights that support it

Equipment library. Modeled lights, modifiers, stands, camera bodies and lenses — drag what you need straight into the scene.

A light selected in the studio: inspector open on the left, move, height, yaw and tilt handles on the light
Equipment library: flashes, continuous lights, backdrops, boards, a scrim and a clamshell reflector

Watch the studio respond. See the photograph it makes.

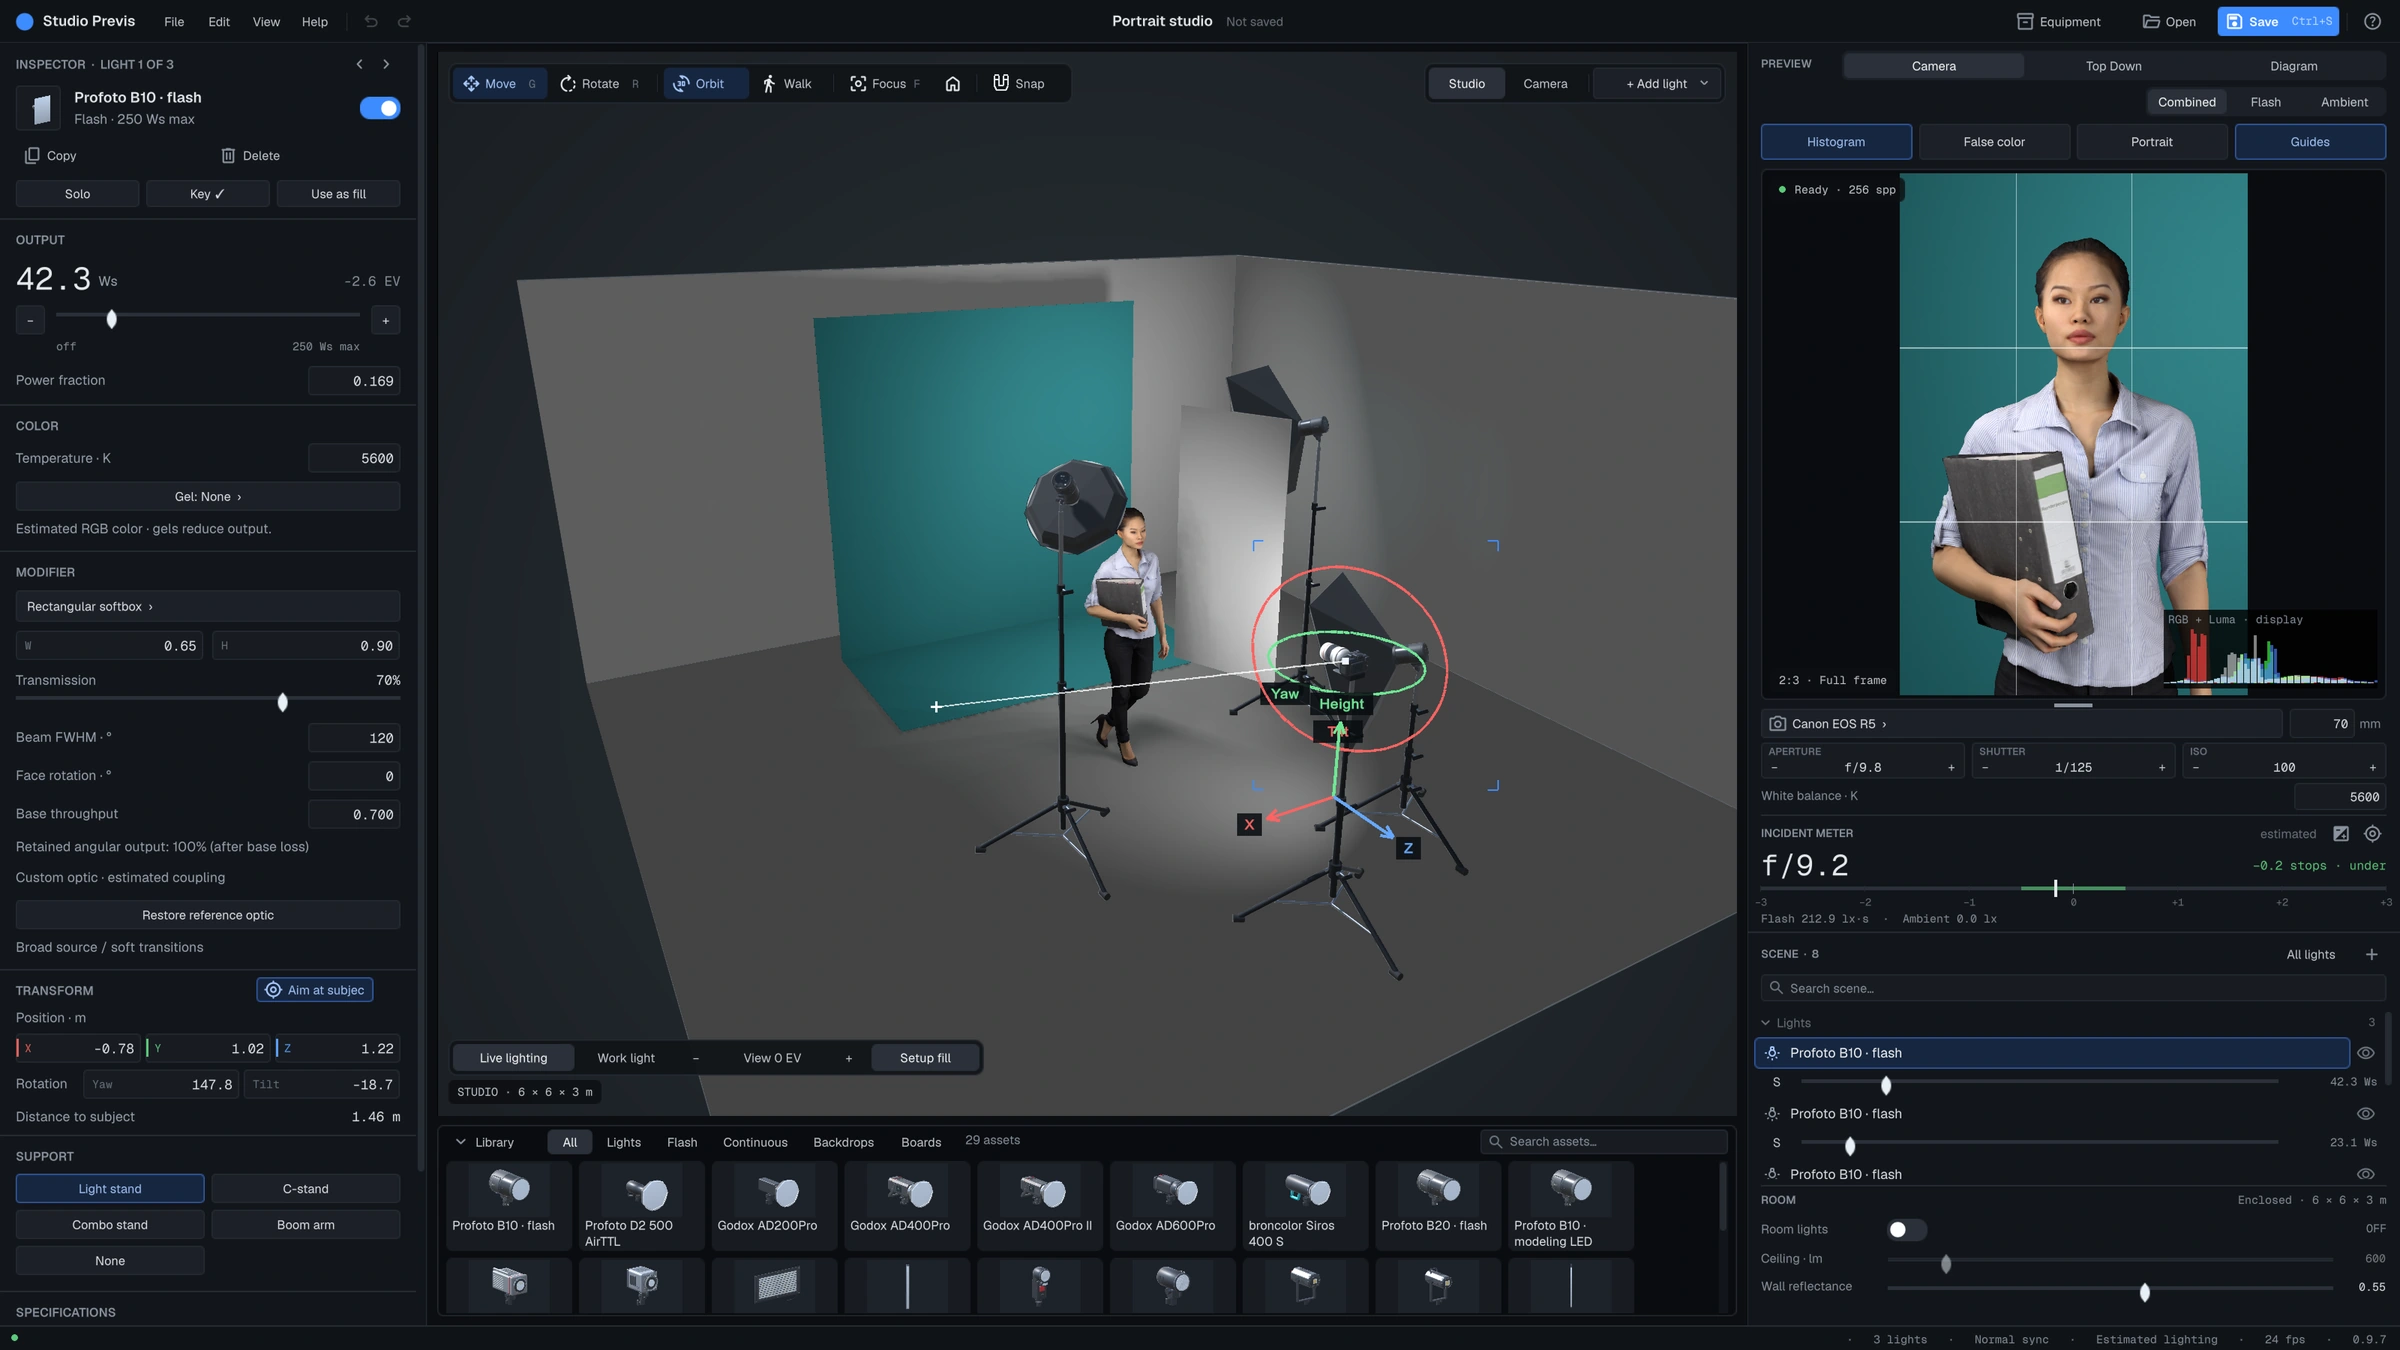
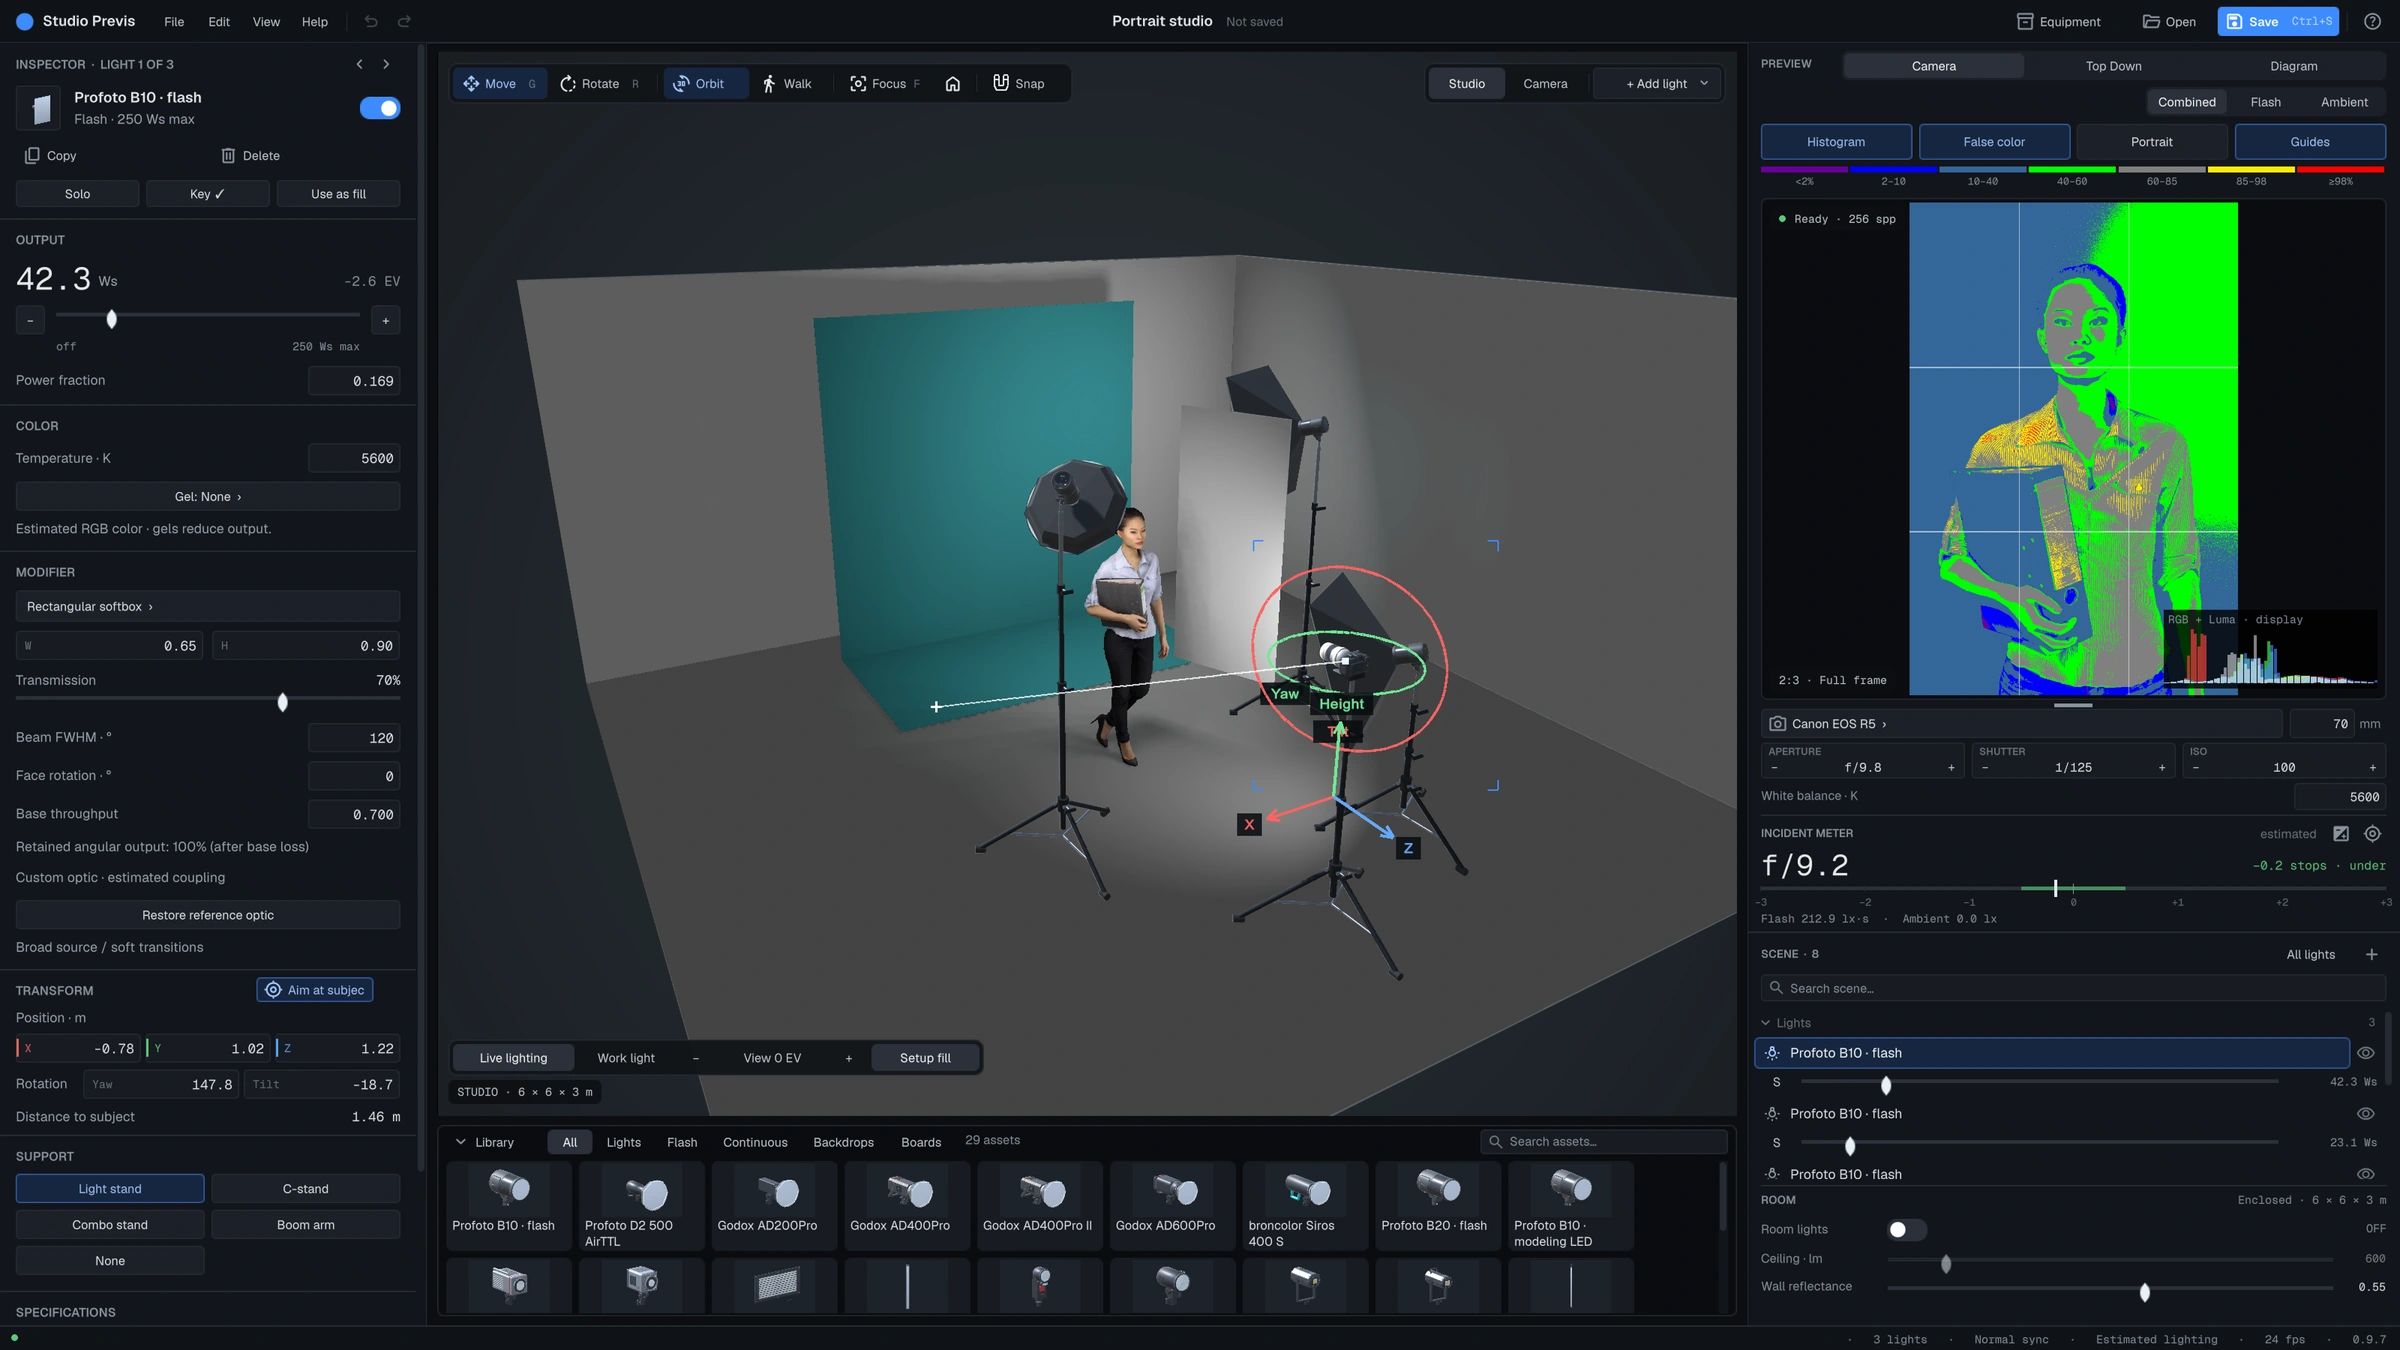
Live lighting in the studio updates as you move and adjust each light. Next to it, a separate photographic preview shows what your camera would record, with a histogram, guides and false color for checking exposure.

Preview overlay
Workspace with the camera preview showing histogram and composition guides
Workspace with the camera preview in false color, showing exposure zones

Exposure tools. Switch on a histogram, composition guides or false color in the preview to check highlights and shadows before you shoot.

Estimated metering. Check an incident reading at the subject and compare key with fill — a planning guide, not a replacement for your meter on set.
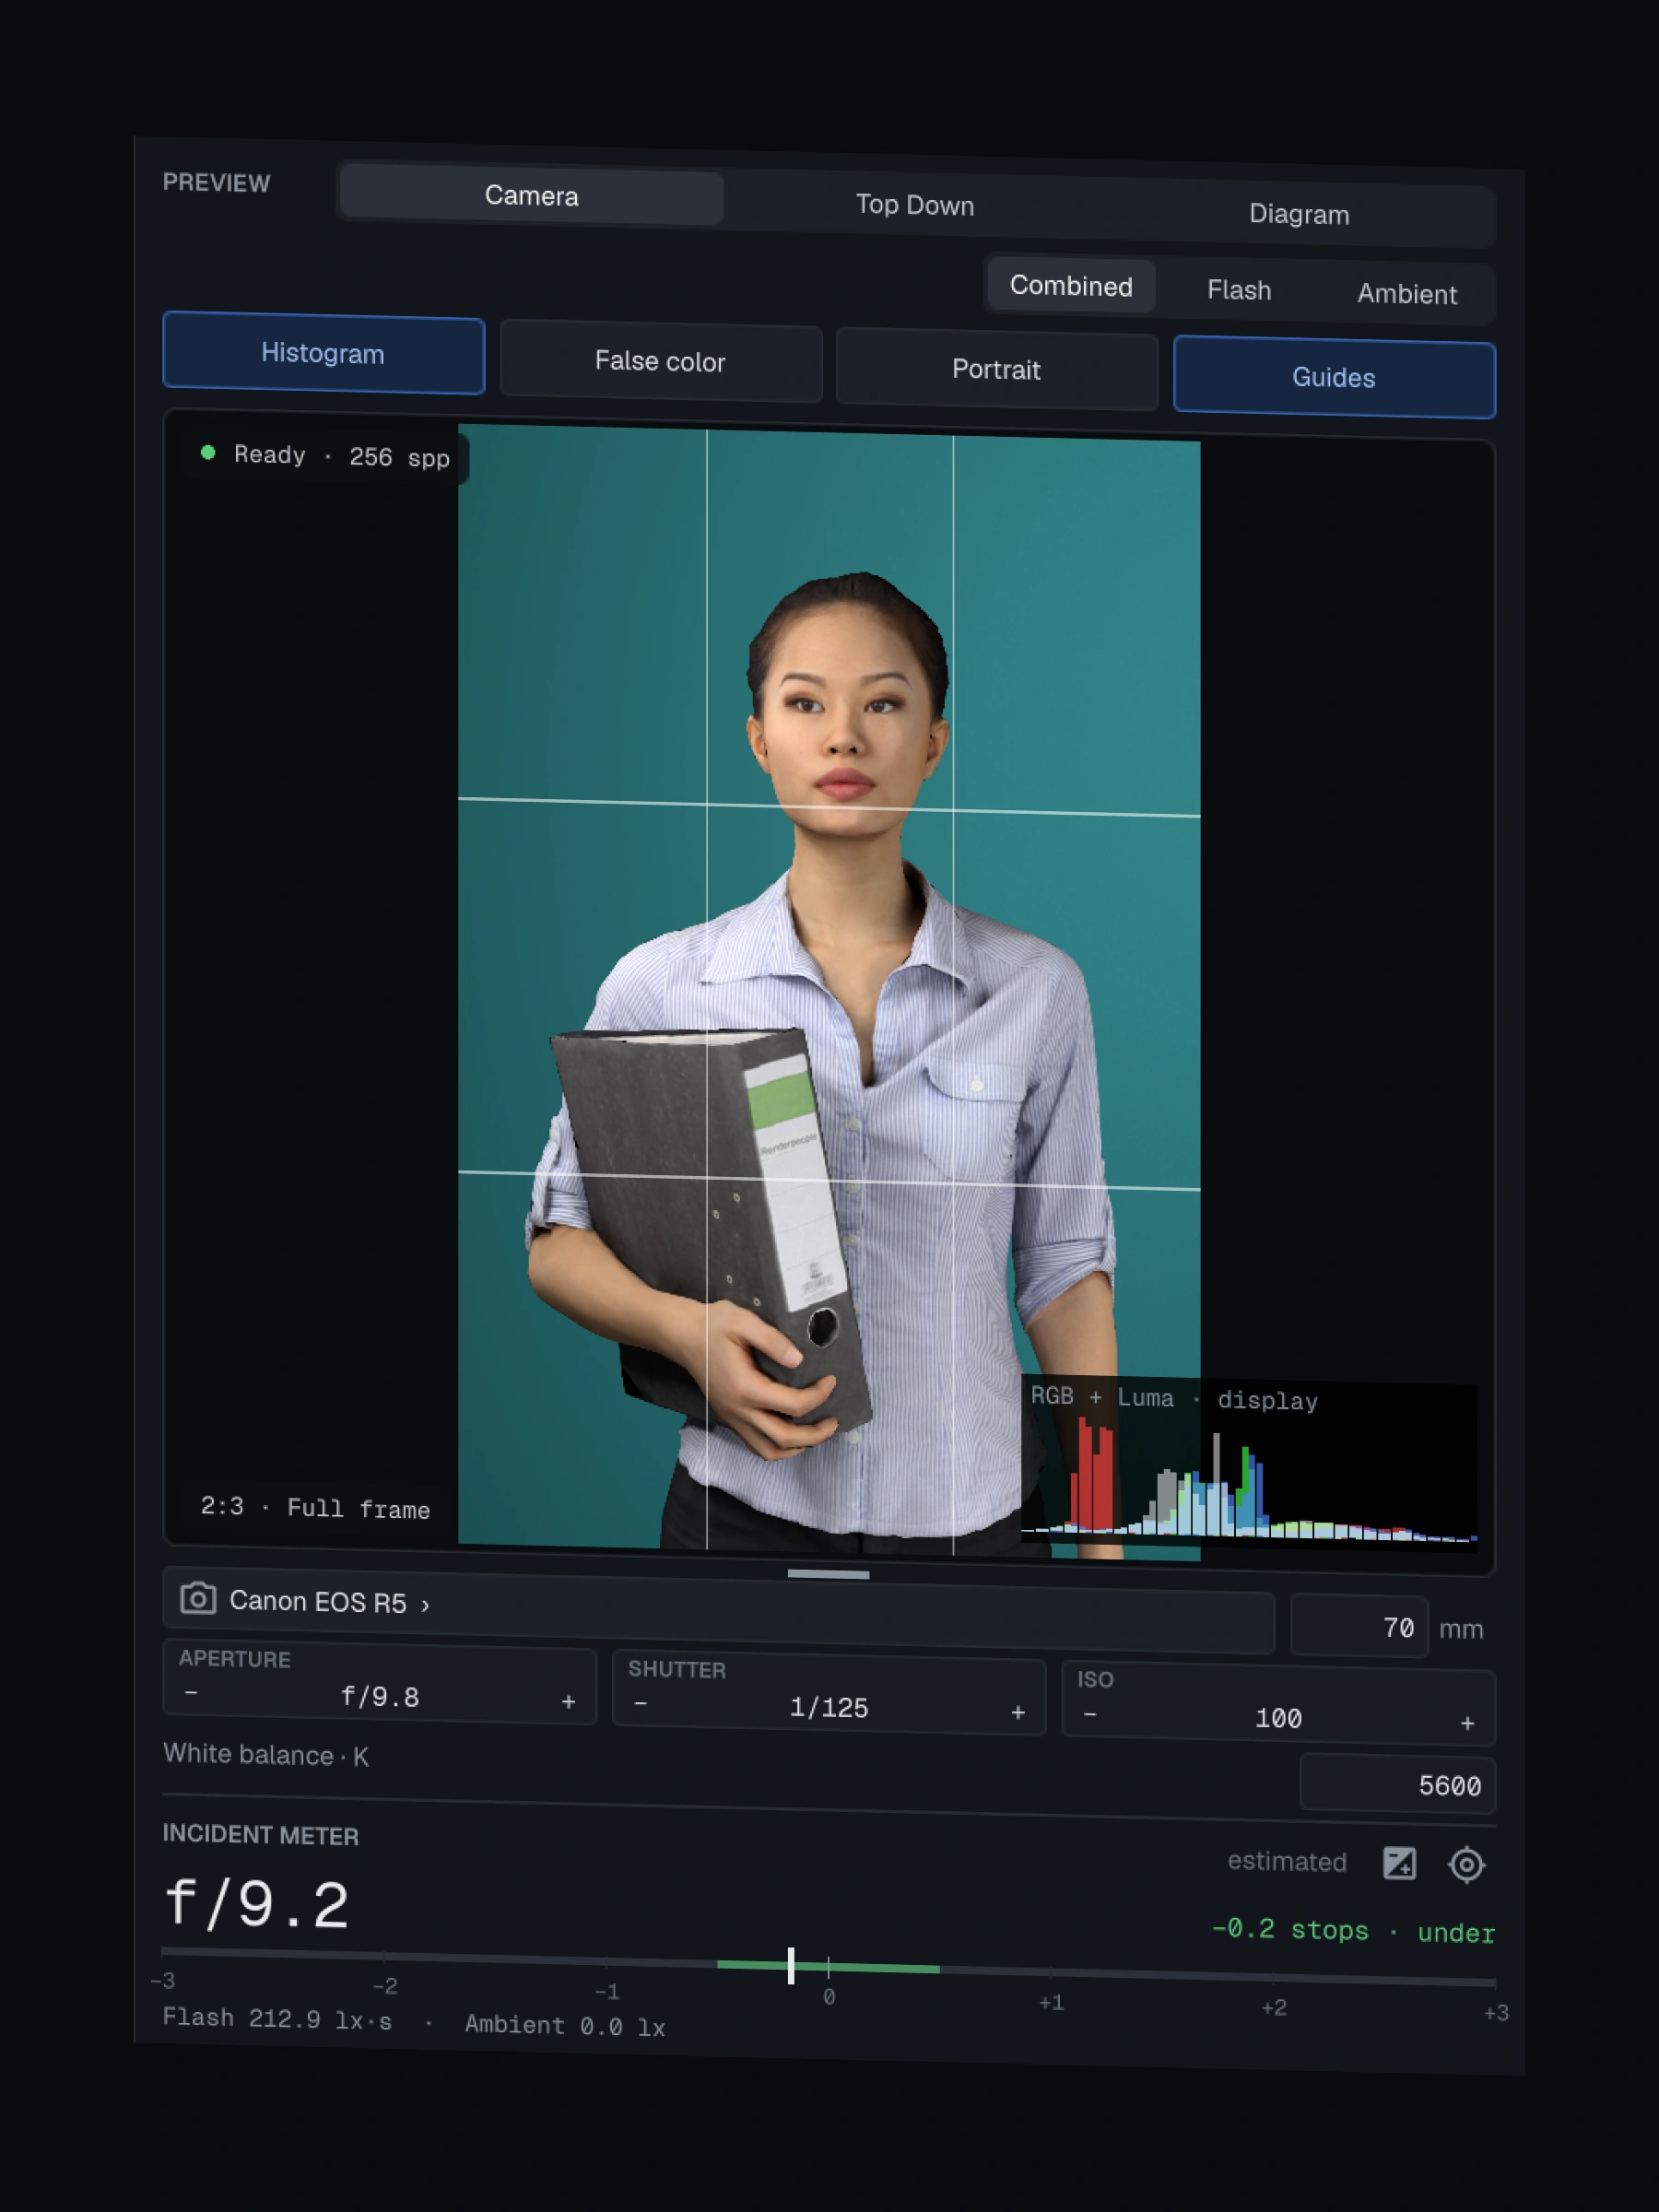
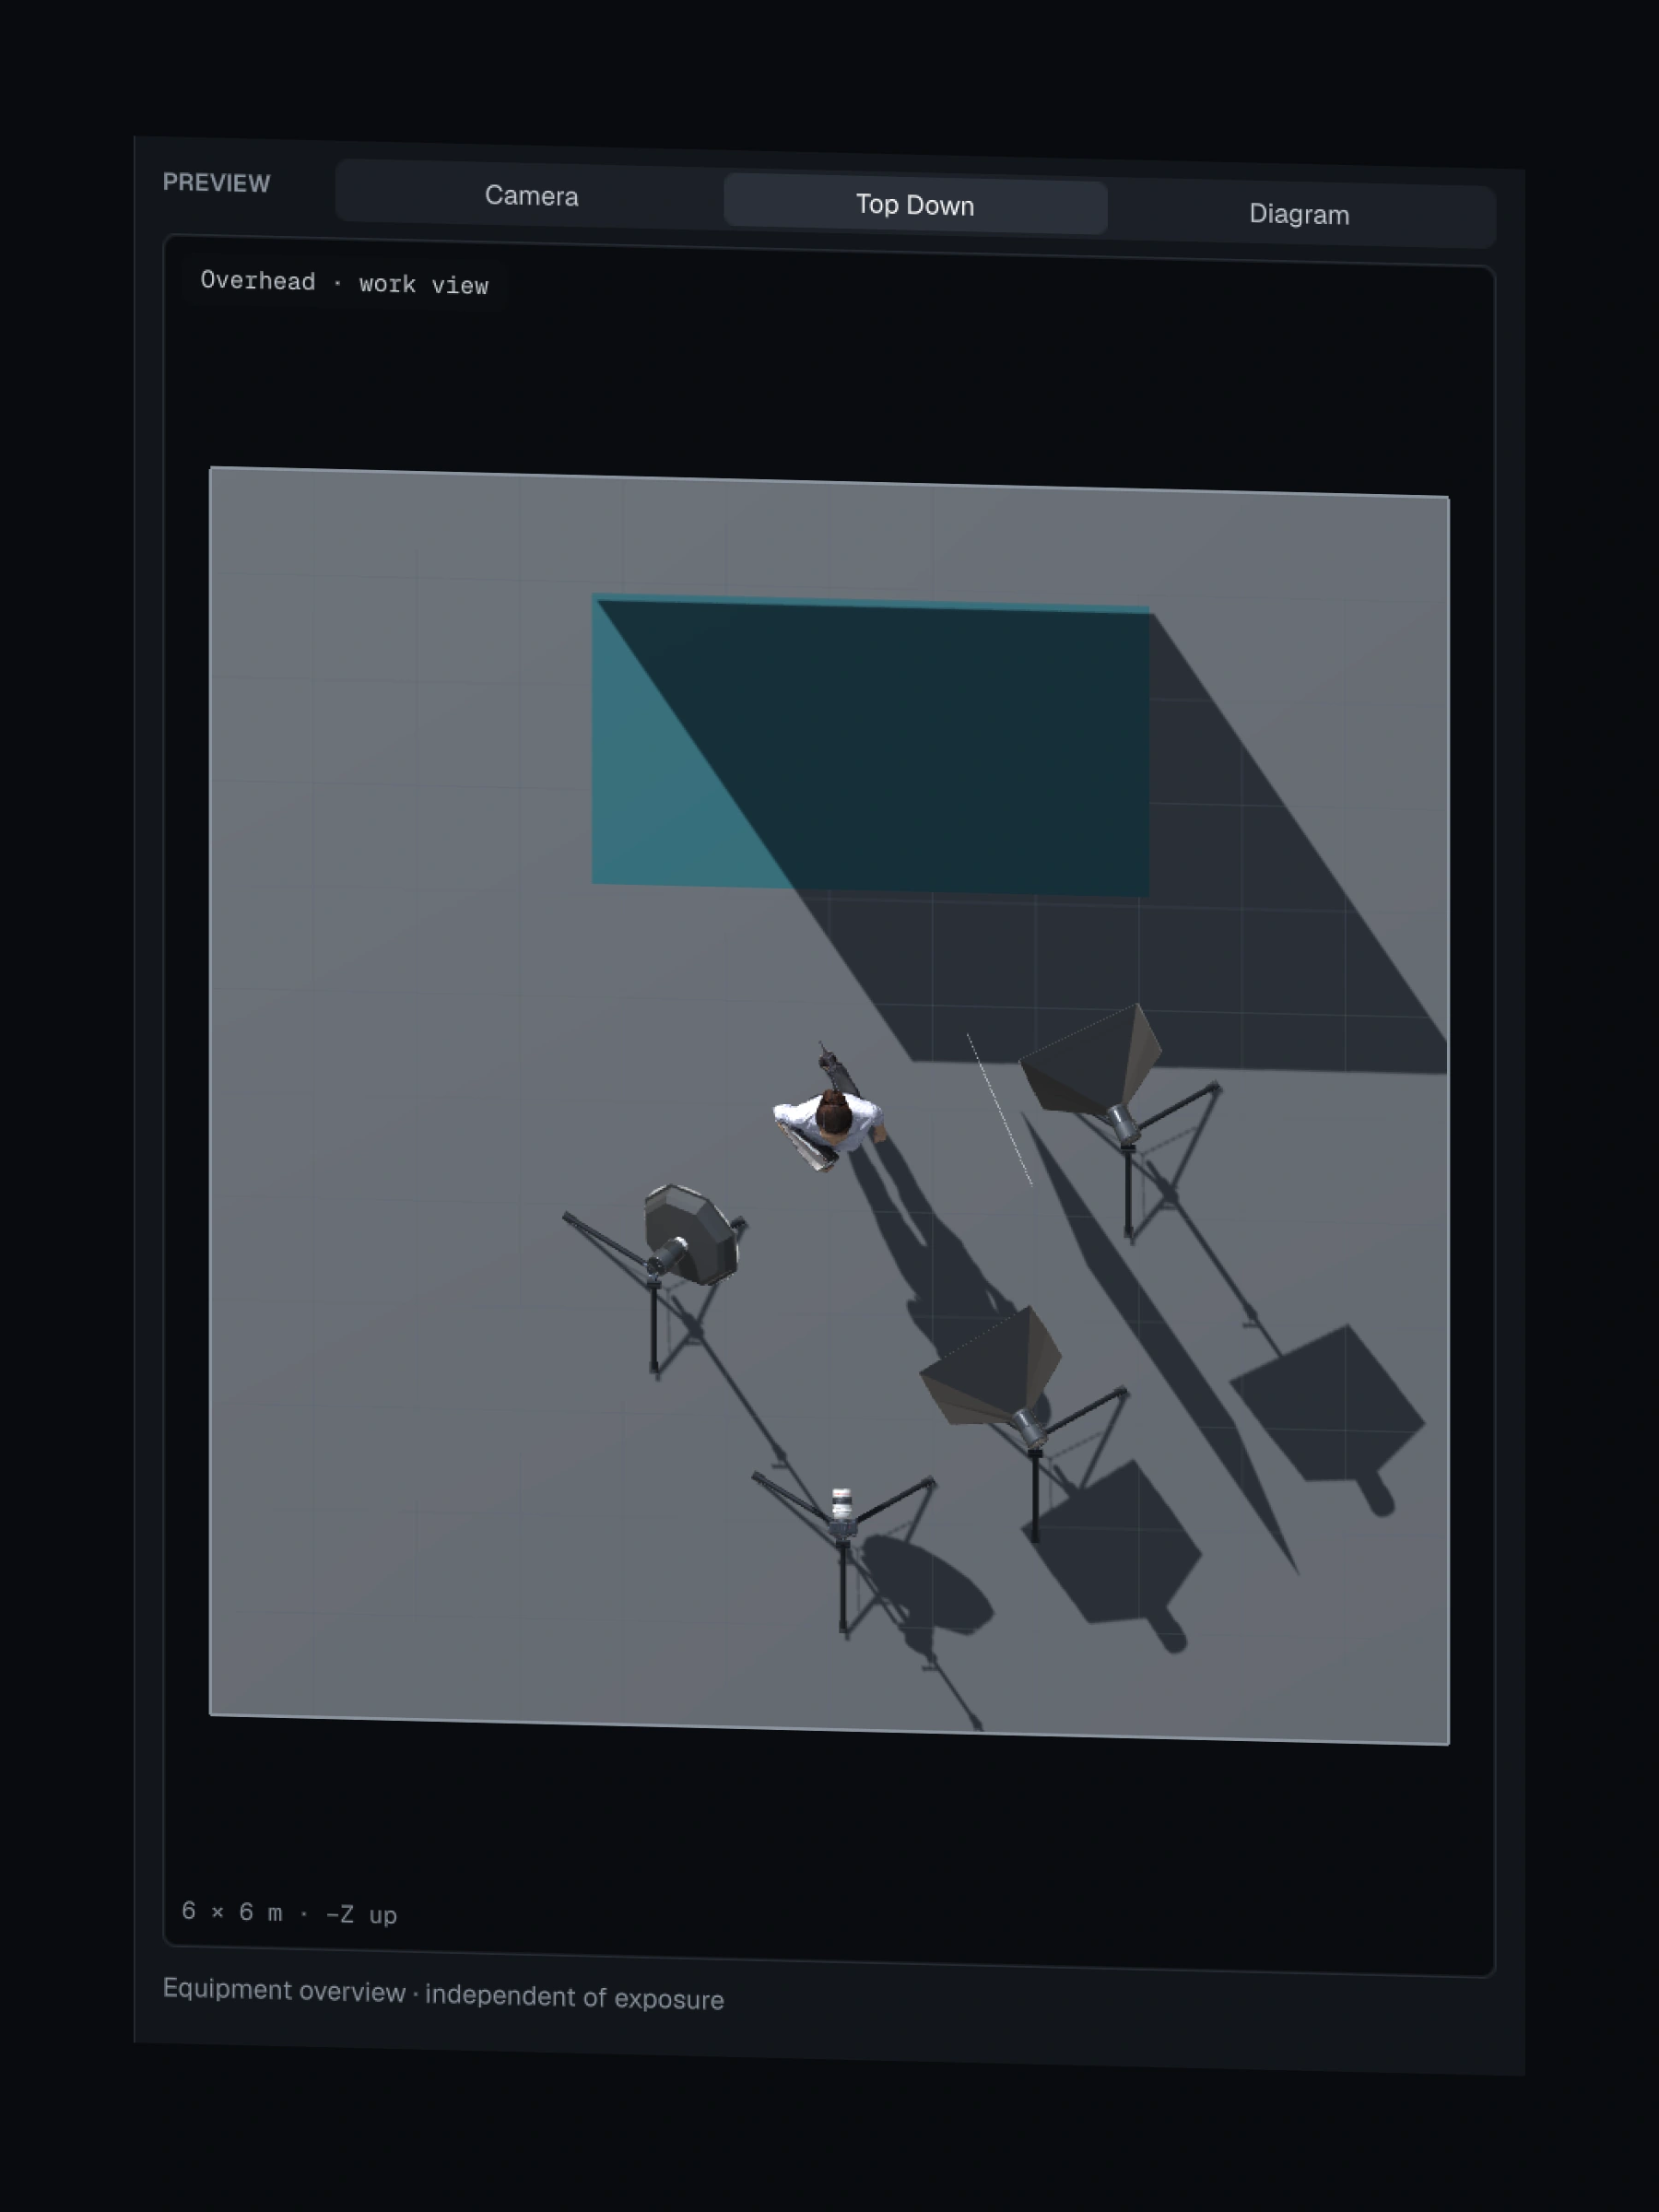
Read the same setup three ways.

Camera view: the photograph with guides and histogram, camera body, lens, aperture, shutter, ISO, white balance and incident meter
Top Down view: the set seen from above with lights, subject, backdrop and camera
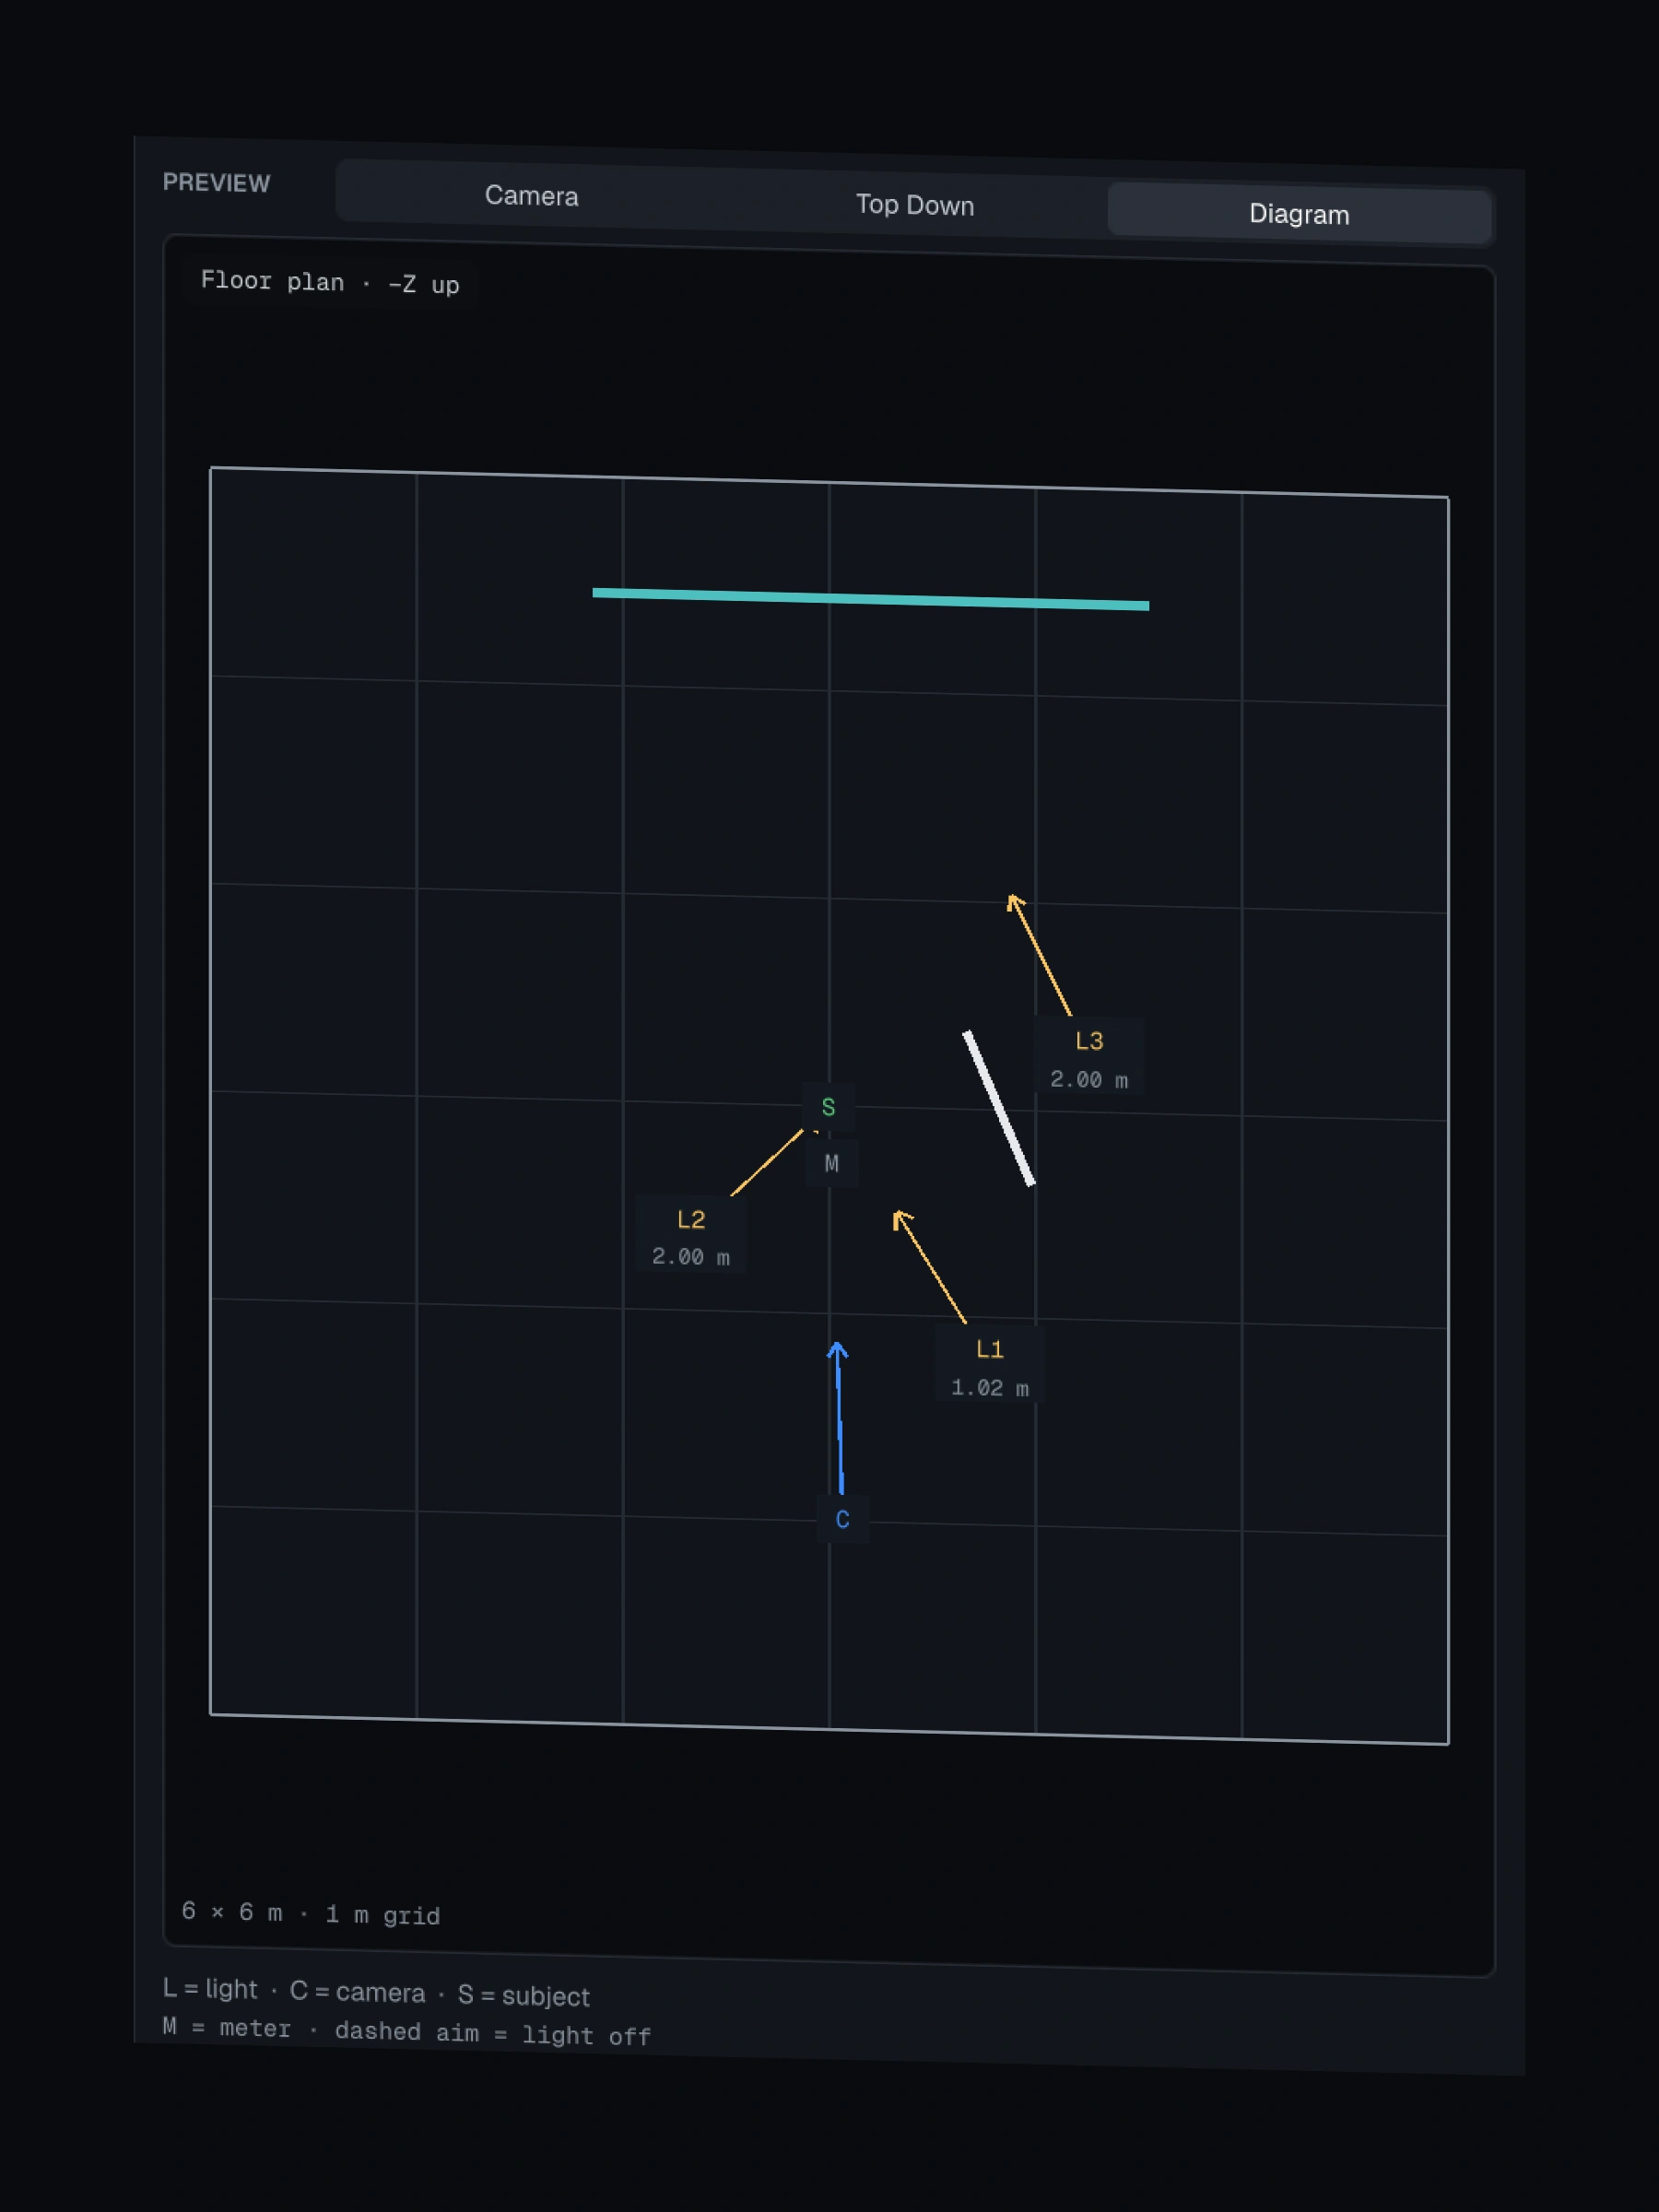
Diagram view: floor plan with lights L1 to L3, camera, subject, meter and distances

Also in the current release

Camera controls

Exposure, white balance, focus and depth of field.

On-set handles

Move, height, yaw and tilt, directly in the studio.

Saving and recovery

Scene saves, snapshots, recovery and Undo/Redo.

Your layout

Resizable workspace panels to suit your screen.

Use cases

Make the decisions before the day.

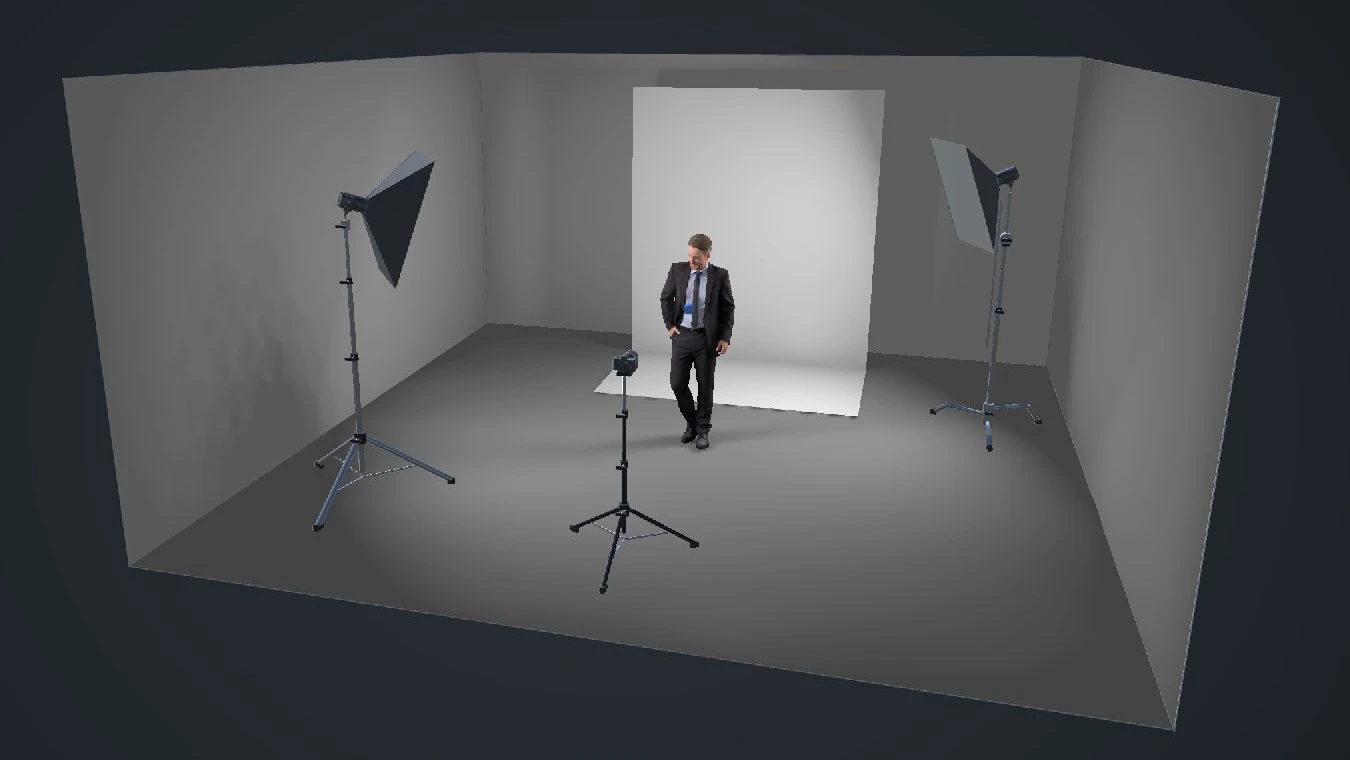
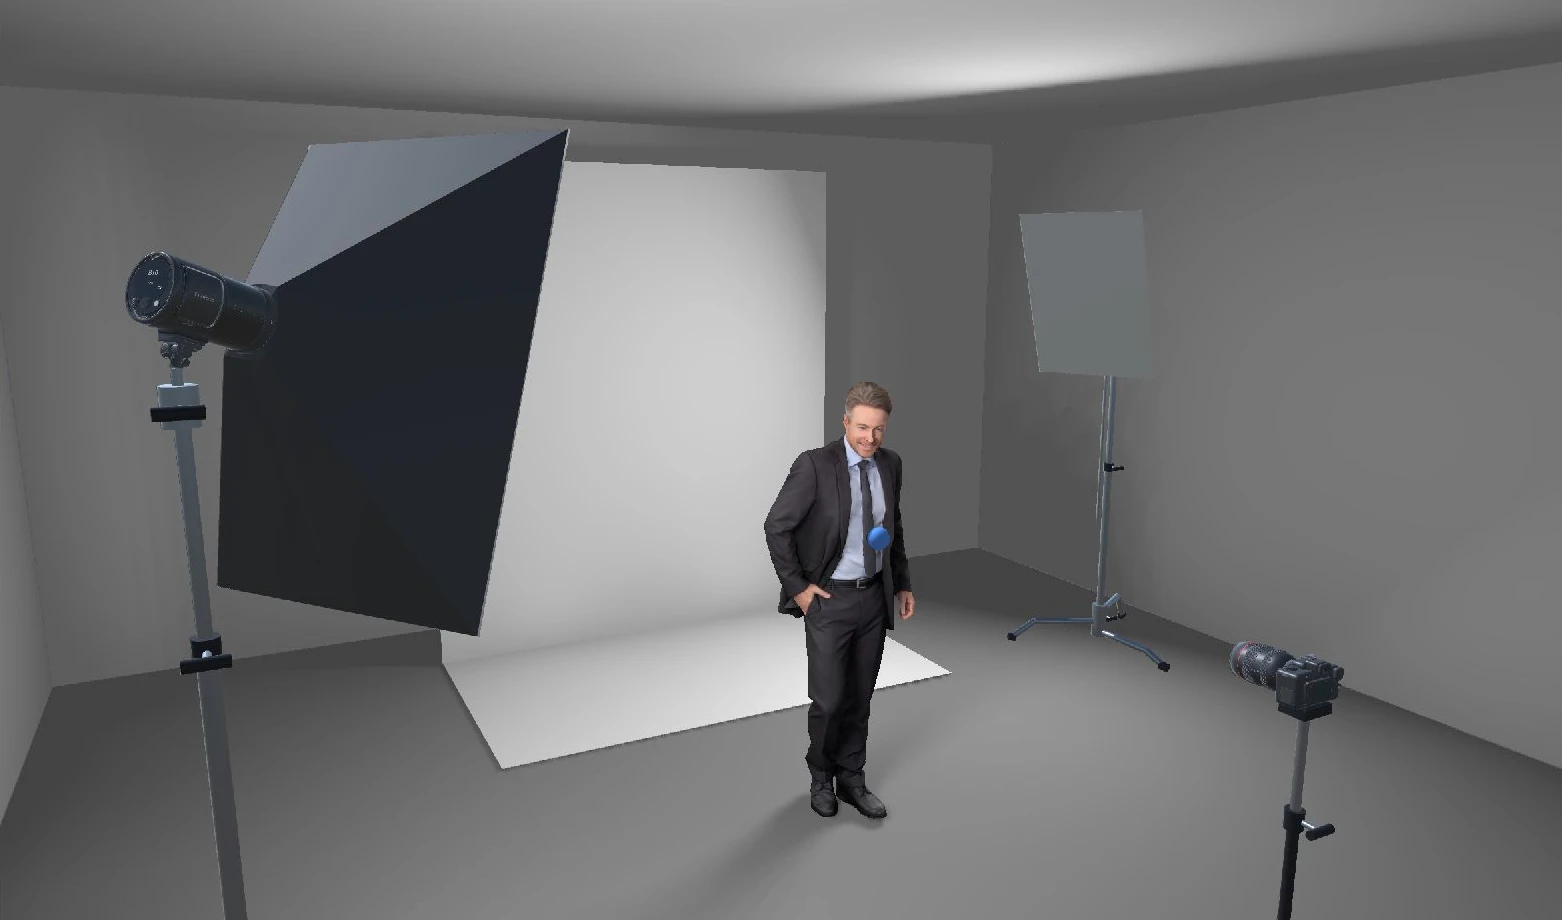
A high-key portrait setup: large softbox with a flash head, white paper backdrop, a bounce board and camera, with the subject in a suit
01

Plan a portrait

Block out key, fill and rim before your subject arrives. Frame it with the lens you'll use, check the preview, and save the scene to open again on the day.

  • Bodies & lenses
  • Key/fill
  • Scene saves
An umbrella on a boom arm over the subject, flanked by two white boards in front of a black backdrop
02

Explore modifier choices

Try different modifiers on the same light and keep a snapshot of each. Compare how the light's shape and softness change before you decide what to pack.

  • Modifiers
  • Snapshots
  • Solo
The whole virtual studio from above: two strip softboxes, a white backdrop, the subject and camera in a 6 by 6 metre room
03

Practice without a studio

Learn how distance, height and angle change a light — at your desk, without booking space or rigging stands. Educators can walk a class through Camera, Top Down and Diagram views.

  • Handles
  • Top Down
  • Undo/Redo

FAQ

Good questions.

Something else? Visit Help.

Yes. LightKit Pro is a desktop app, and the free beta includes Windows and Mac builds.

On Windows, a 64-bit PC with Direct3D 11 graphics (Windows 11 recommended). On Mac, macOS 12 or later on Intel or Apple silicon. 16 GB of memory is recommended. Full details are on the Get started page, and guidance will evolve as we test more computers.

Lighting, meter readings and key/fill comparisons are estimates designed for planning and learning. They aren't calibrated to specific manufacturers' equipment and won't match every real-world result exactly — confirm with your meter and camera on set.

Yes. Save scenes, take snapshots as you explore, and recover your work if the app closes unexpectedly. Undo and Redo work throughout, and you can export the photograph as a PNG at up to 1600 × 2400. Diagram export isn't available yet.

Yes. Joining the waitlist is free, and invited testers can explore LightKit Pro throughout the beta. Invitations go out in stages as testing spots become available.

Posing, custom model importing, cloud collaboration, animation, volumetric fog and diagram export aren't available today.

Walk on set knowing where the light goes.

The LightKit Pro beta is free for Windows and Mac. Join the waitlist and help shape what comes next.

Join the free beta
{{ box.label }}

Drag to pan

Demo coming soon
Video replacement slot Screen recording, about 60–90 seconds: arrange equipment, shape the light, preview and save. Video not yet produced
A subject holding a binder in a virtual studio with an octabox and softbox against a teal backdrop
Free beta · Windows & Mac

Join the waitlist.

Join the LightKit Pro waitlist for a chance to test the free Windows and Mac beta.

  • Preview lighting setups
  • Experiment before your next shoot
  • Help shape the app with your feedback

We’ll email you a link to confirm your signup.

Read our Privacy Policy and Waitlist & Beta Terms.

Built for creative studios Photographers · Filmmakers · 3D Artists

You're on the list.

We'll email {{ wlEmail }} when a beta spot becomes available.

Waitlist signups open soon. Please check back.