- 1
Open LightKit Pro
Download the build provided with your beta invitation. On Windows, extract the entire ZIP before launching, and keep the executable and its accompanying folders together. On Mac, follow the installation instructions included with your build. Some beta packages may still show the earlier name, Studio Previs.
- 2
Start a studio
Use File to start a new studio or open an existing .studio scene. The central view is your working studio, the inspector controls the selected object, and the camera preview shows the photograph you're composing.
- 3
Add a light
Choose a light from the asset library and drag it into the room, or use Add light. Select it to adjust position, power and modifier. Start with one light so you can see how each adjustment changes the result.
- 4
Compose the photograph
Select the camera and adjust its position, focal length and exposure. Moving around the working studio doesn't move the shooting camera. Let the photographic preview refine after each change.
- 5
Shape the light
Move the light closer or farther, change its angle, and try different modifier sizes. Add a backdrop, bounce board or flag as needed. Use the lighting modes to compare flash, ambient and combined contributions.
- 6
Save your setup
Use File › Save to create a .studio file. Save regularly and keep backups of important setups. A scene that references a subject unavailable in your installed build may not open.
- 7
Export an image
Choose File › Export photograph. The current build exports PNG images at 240 × 360, 800 × 1200 or 1600 × 2400, with a choice of sample counts. Higher resolutions and sample counts take longer. Export uses the camera and lighting state captured when you start it.
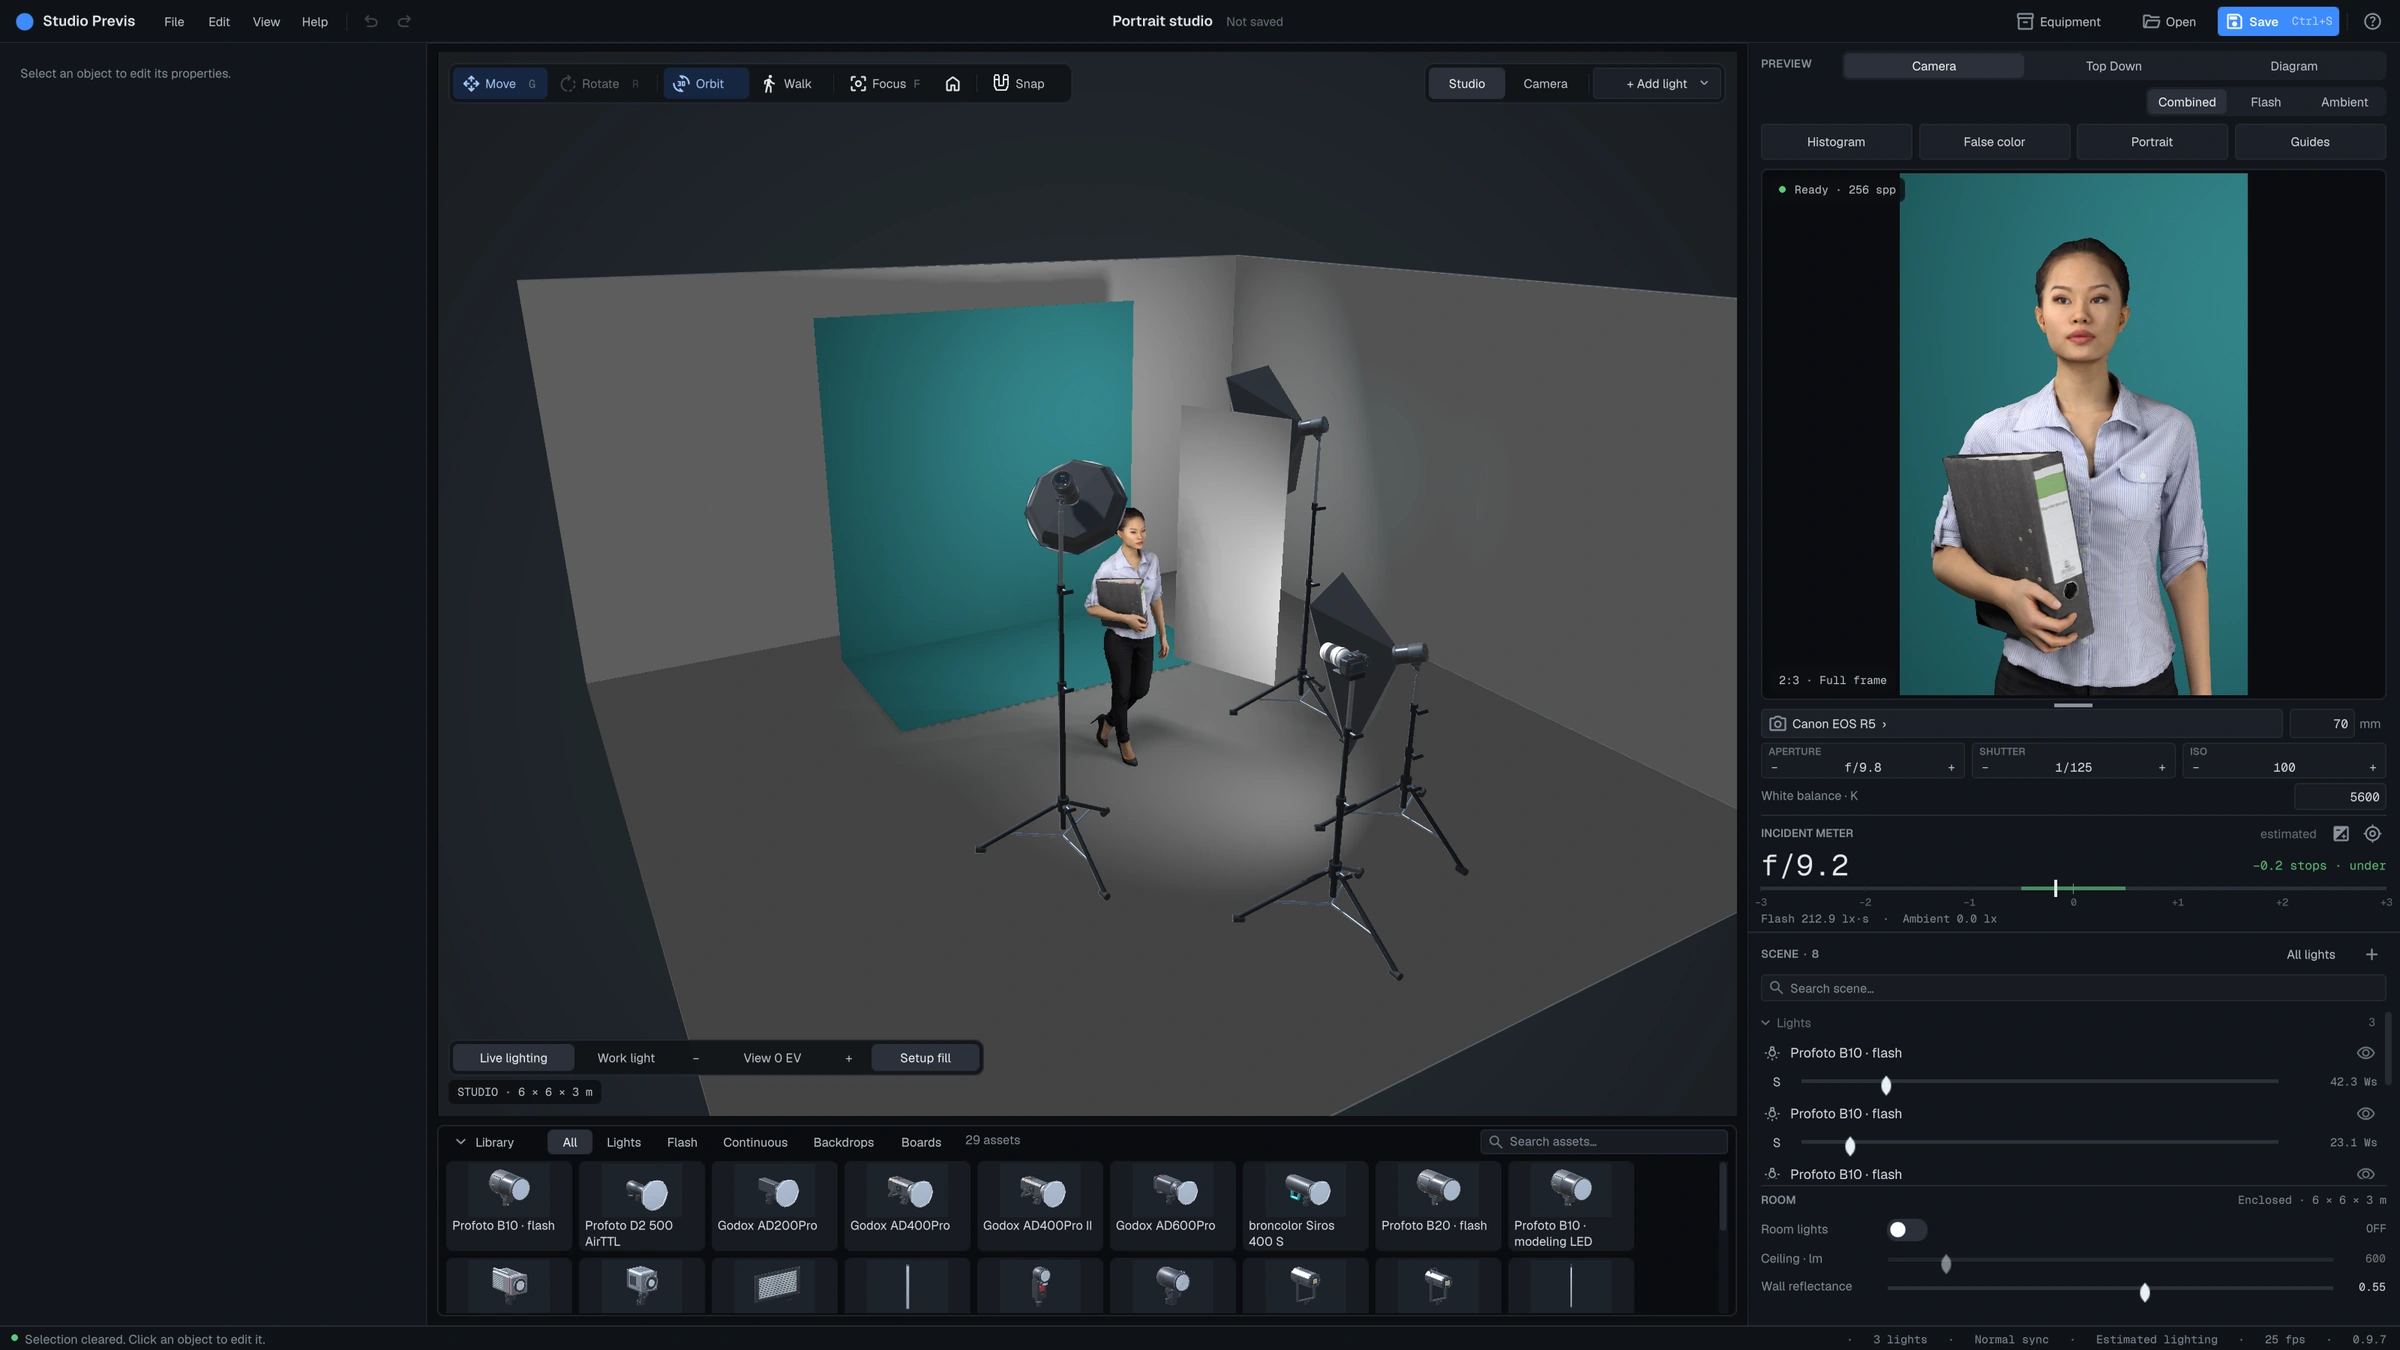
Understanding the preview
Setup fill makes the working studio easier to navigate. It doesn't change the photographic preview, the exported photograph or the incident-meter result. Judge your intended photograph using the camera preview and export, not the brightness of the navigation view.
Accuracy and beta limitations
LightKit Pro estimates lighting to help you plan and explore. Equipment geometry, output profiles, surface materials and meter readings are approximations, and the app doesn't reproduce every characteristic of a physical light, modifier, lens, camera or subject. Confirm exposure, equipment placement and rigging safety on your actual set. Beta performance, assets and features may change.
Troubleshooting
Still stuck? Contact support.
- App won't start
- Confirm you downloaded the correct platform build and extracted all files. Send the exact error to support.
- Preview is slow
- Let it finish refining, close other graphics-heavy apps, and try a smaller export with fewer samples.
- Scene won't open
- Keep the original file and contact support with the app version and error message.
- Layout feels cramped
- Resize the dock dividers, collapse the library, or use View › Reset layout.